I apologise in advance for those who have done this before but thought a few words on my process might be helful to those who have not done it before or like myself it was decades ago so the skills are a bit rusty. I started 2 days ago doing preparation work as some things take time so I've not rushed anything. I've not gone for vapour blasting as I'm happy enough with my old fashioned cheapskate manual process & finish. Not aiming for stage 4 mirror finishes with gas flowed head just something close to standard. I bought some rotary wire brushes a few weeks ago on e-bay when they arrived were a fraction of the size I thought I was buying - the toy size is ideal for this kind of job.
1) I have removed the valves and stored them in numbered boxes with all the seating washers etc. I started removing the carbon by putting the valves in my cordless drill & using a Stanley knive blade as a cutter to remove the heavy deposits avoiding the main valve stem where it goes into the guides. A final polish was given using some old/worn 400 grit wet & dry - I've not gone for a mirror finish just nice and free of carbon. Avoiding any contact with the valve seating areas as I cleaned up the valves.
2) I checked the inner & outer spring lengths against the manual mine are all good - actually a tad longer all round compared to the measurements in the manual. Some very light surface rust so washed again in petrol then overnight into fresh Evaporust in a small Tuperware container - lid in place to avoid spillages.
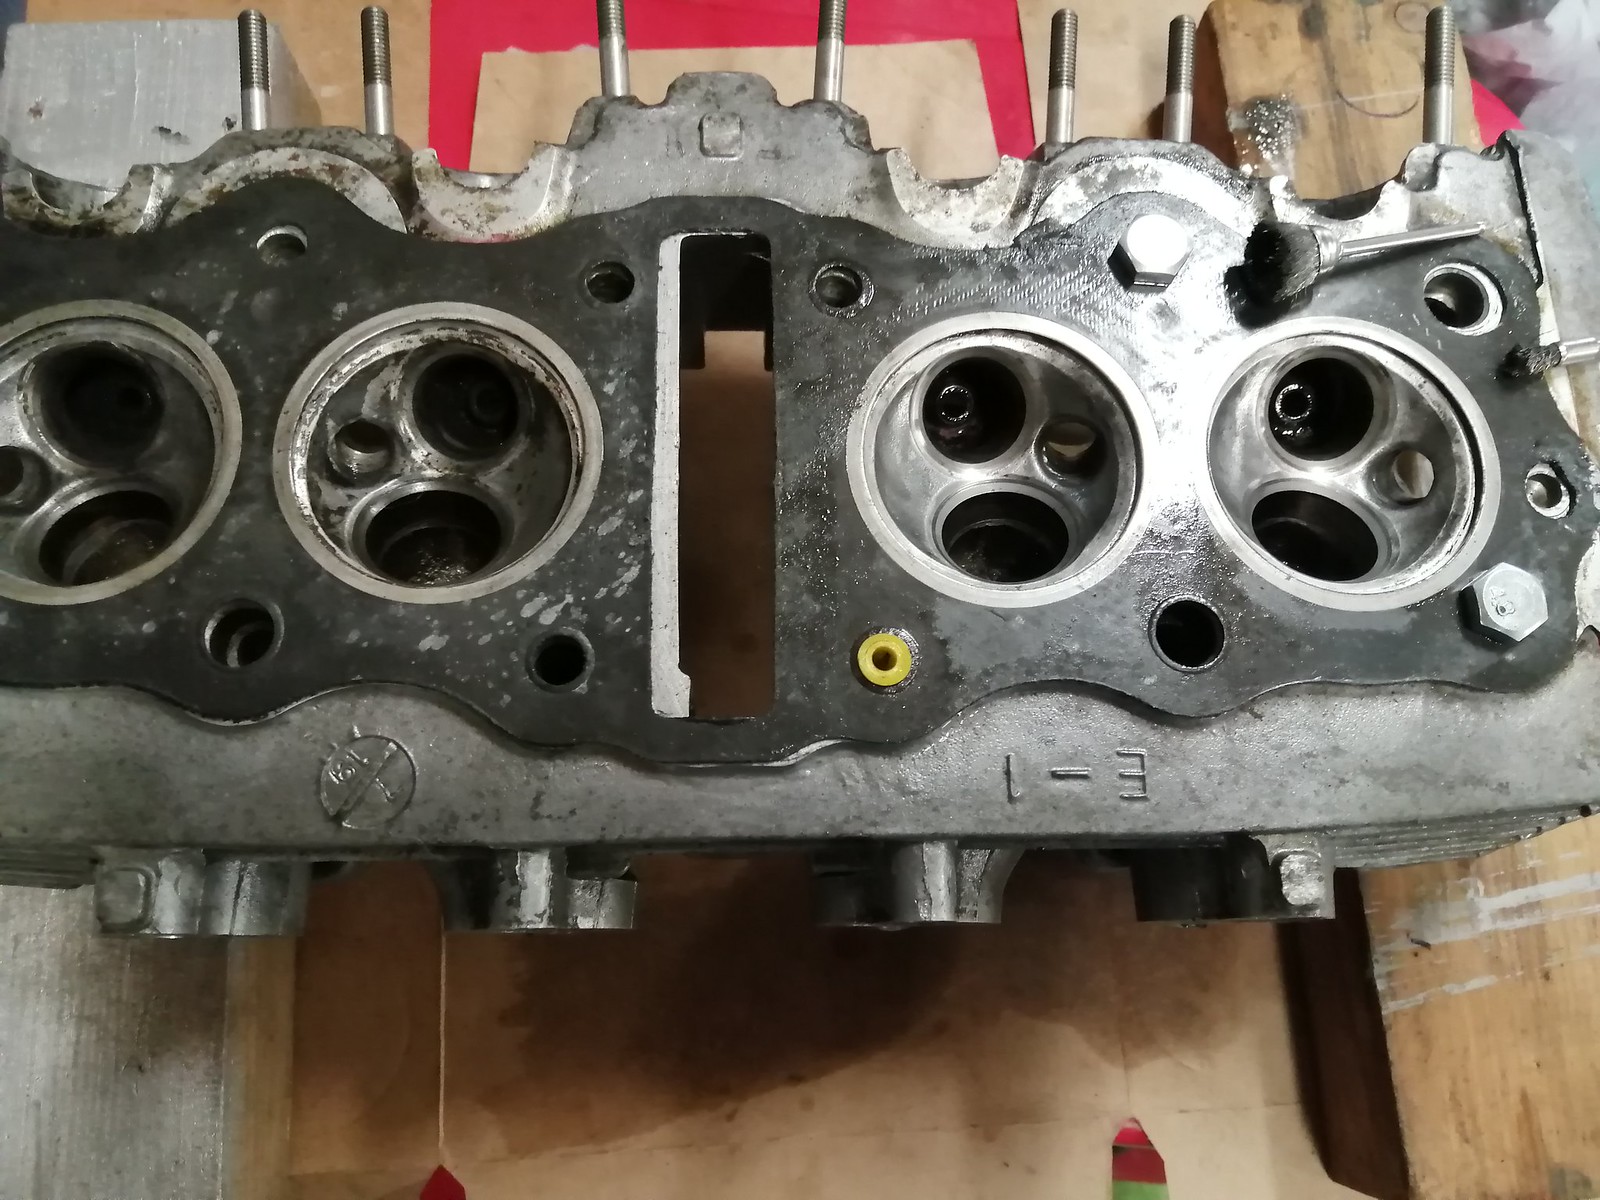
3) I then gave my cylinder head a good wash in petrol to get off the years of muck mainly on the outside plus there is the usual carbon deposits on the inside of the ports that I will remove the worst of later. I used an old tooth brush and a small soft brass brush to clean the areas around the spark plug holes and a stiff nylon brush to clean between the cooling fins
4) Left my cylinder head in a bath of Diesel overnight in the hope of softening the deposits a little. This was probably pointless but I have convinced myself it has helped.
5) I paper dried the head to reduce splatter put a pair of the valves in number one cylinder then put the old headgasket in place using some spare bolts & an old rawplug to hold the gasket in position whislt I used a small wire brush in my cordless drill to remove around 95% of the carbon - being careful not to go into the headgasket sealing area with my rotating brushes. A used gasket makes an effective mask not just to protect the head surfaces but later to help mask off bits when I paint the head.
6) I will repeat above process for all four cylinder combustion chambers.
7) I then set about grinding in the valves using only fine paste as mine are in surprisingly good condition. When grinding in the valves I supported the head on a couple of blocks of softwood so I was able to get my fingers onto the end of the valve stem when needed.
I did not have the luxury of one of those oscilating tools - I found that by letting the grinding past do the work as I was working the lapping tool it did not keep on coming off the valve head. Likewise as I was lapping in the valve I kept on lifting the tool rotating it a little each time so I was working my way around the seat. I lubricated the valve stem each time I pulled out the valve to check on the seating faces and carefully cleaned off the waste paste before replacing with new.
Each valve took 3 or 4 changes of grinding paste - it took 5-10 minutes per valve to reach a nice finish on the valves. I found that as the valves were almost done the lapping stick sucker would keep on coming off - I think this is a good indicator that the job is done as the surface tension between valve & seat maximise if you get my drift.

I put both valves back in the head then with my small wire brush (see picture) cleaned out the odd traces of carbon that I missed in stage 5. I then removed the valves again & with the small drill mounted wire brush cleaned off the carbon on the ports that I could reach being careful to avoid catching the valve seating areas.
9) Then repeat for all four cylinders.
10) When I have done all four I will give the valve areas another thorough wipe out then clean with petrol to ensure no grinding past gets into the valve guides or remains in the cylinder head.
11) I plan to paint the cylinder head when all the valves have been re-fitted with springs etc. A bit of a back to front process - might have been better to paint after intial decoke & then grind in the valves? A tip from NJ is when you start re-fitting the valve springs make sure the inner & outer are fitted the right way up - tighter coils towards the head I believe.
.
 Head decoking started
 by
Macabe Thiele, on Flickr


