This section allows you to view all posts made by this member. Note that you can only see posts made in areas you currently have access to.
Messages - woody928
1
« on: November 15, 2020, 03:51:31 PM »
Well nearly six months later I'm back on the road again  Having ordered a new MC I was reading another thread on here and came across BryanJ's advice regarding bleeding freshly built MC's before connecting them up to the brake lines. Some messing later and having hand bled it with all of the lines disconnected, suddenly my rebuilt MC was in business. Some time later trying to expel all of the air from the lines and the system had pressure. Strangely though everything was still binding though so having pulled the calliper apart it turns out that my brake pad had managed to wedge itself at an angle meaning that it was totally seized. Having free'd it and realigned it everything was operating just like Honda intended again. Last job was to leave the brake level cable tied on overnight to help get some feel into the lever and I was back in business today following a few tweaks using the adjustor screw. The exhaust has now also been fully fitted up, having tweaked the collector position it was possible to get the exhaust sealed up sufficiently to perform as expected. The only real disappointment is that the centre stand stop is sat a good couple of inches too far back to do anything useful. I've therefore slid it forward a bolt hole so that it is only secured in place with one bolt rather than two, leaving one mounting location literally flapping in the breeze. That said it now performs its intended task and the centre stand clears the chain. Still waiting to hear from Delkevic in the meantime... There's still a few minor tasks to perform however having doused the bike in ACF50 and lubed the chain it was time to hit the road, taking it steady to see how everything is bedding in and initial signs are really encouraging. The brakes are about effective as you'd expect however a significant improvement over when I picked the bike up, the rear locks easily enough if you desire. The engine is performing a million times better and really happy to pull all the way up the revs now, its literally like a different bike now. Poor weather sent me home however I'll be doing some more road testing as soon as the weather allows. The battery is also happily charging again having repaired the wiring from the alternator. All that said I think the rear suspension needs some time to bed in a little, and I'm trying to be very careful on my spanking new skinny tyres particularly on damp road surfaces. When time allows I'd like to remove the centre stand to refurb it as its looking pretty rough, I want to check over some wiring to my taillight and get my phone charger wired into the ignition (thinking to use the wiring to the ignition coils) when time allows for those longer summer days. It appears that the tasks are never ending... 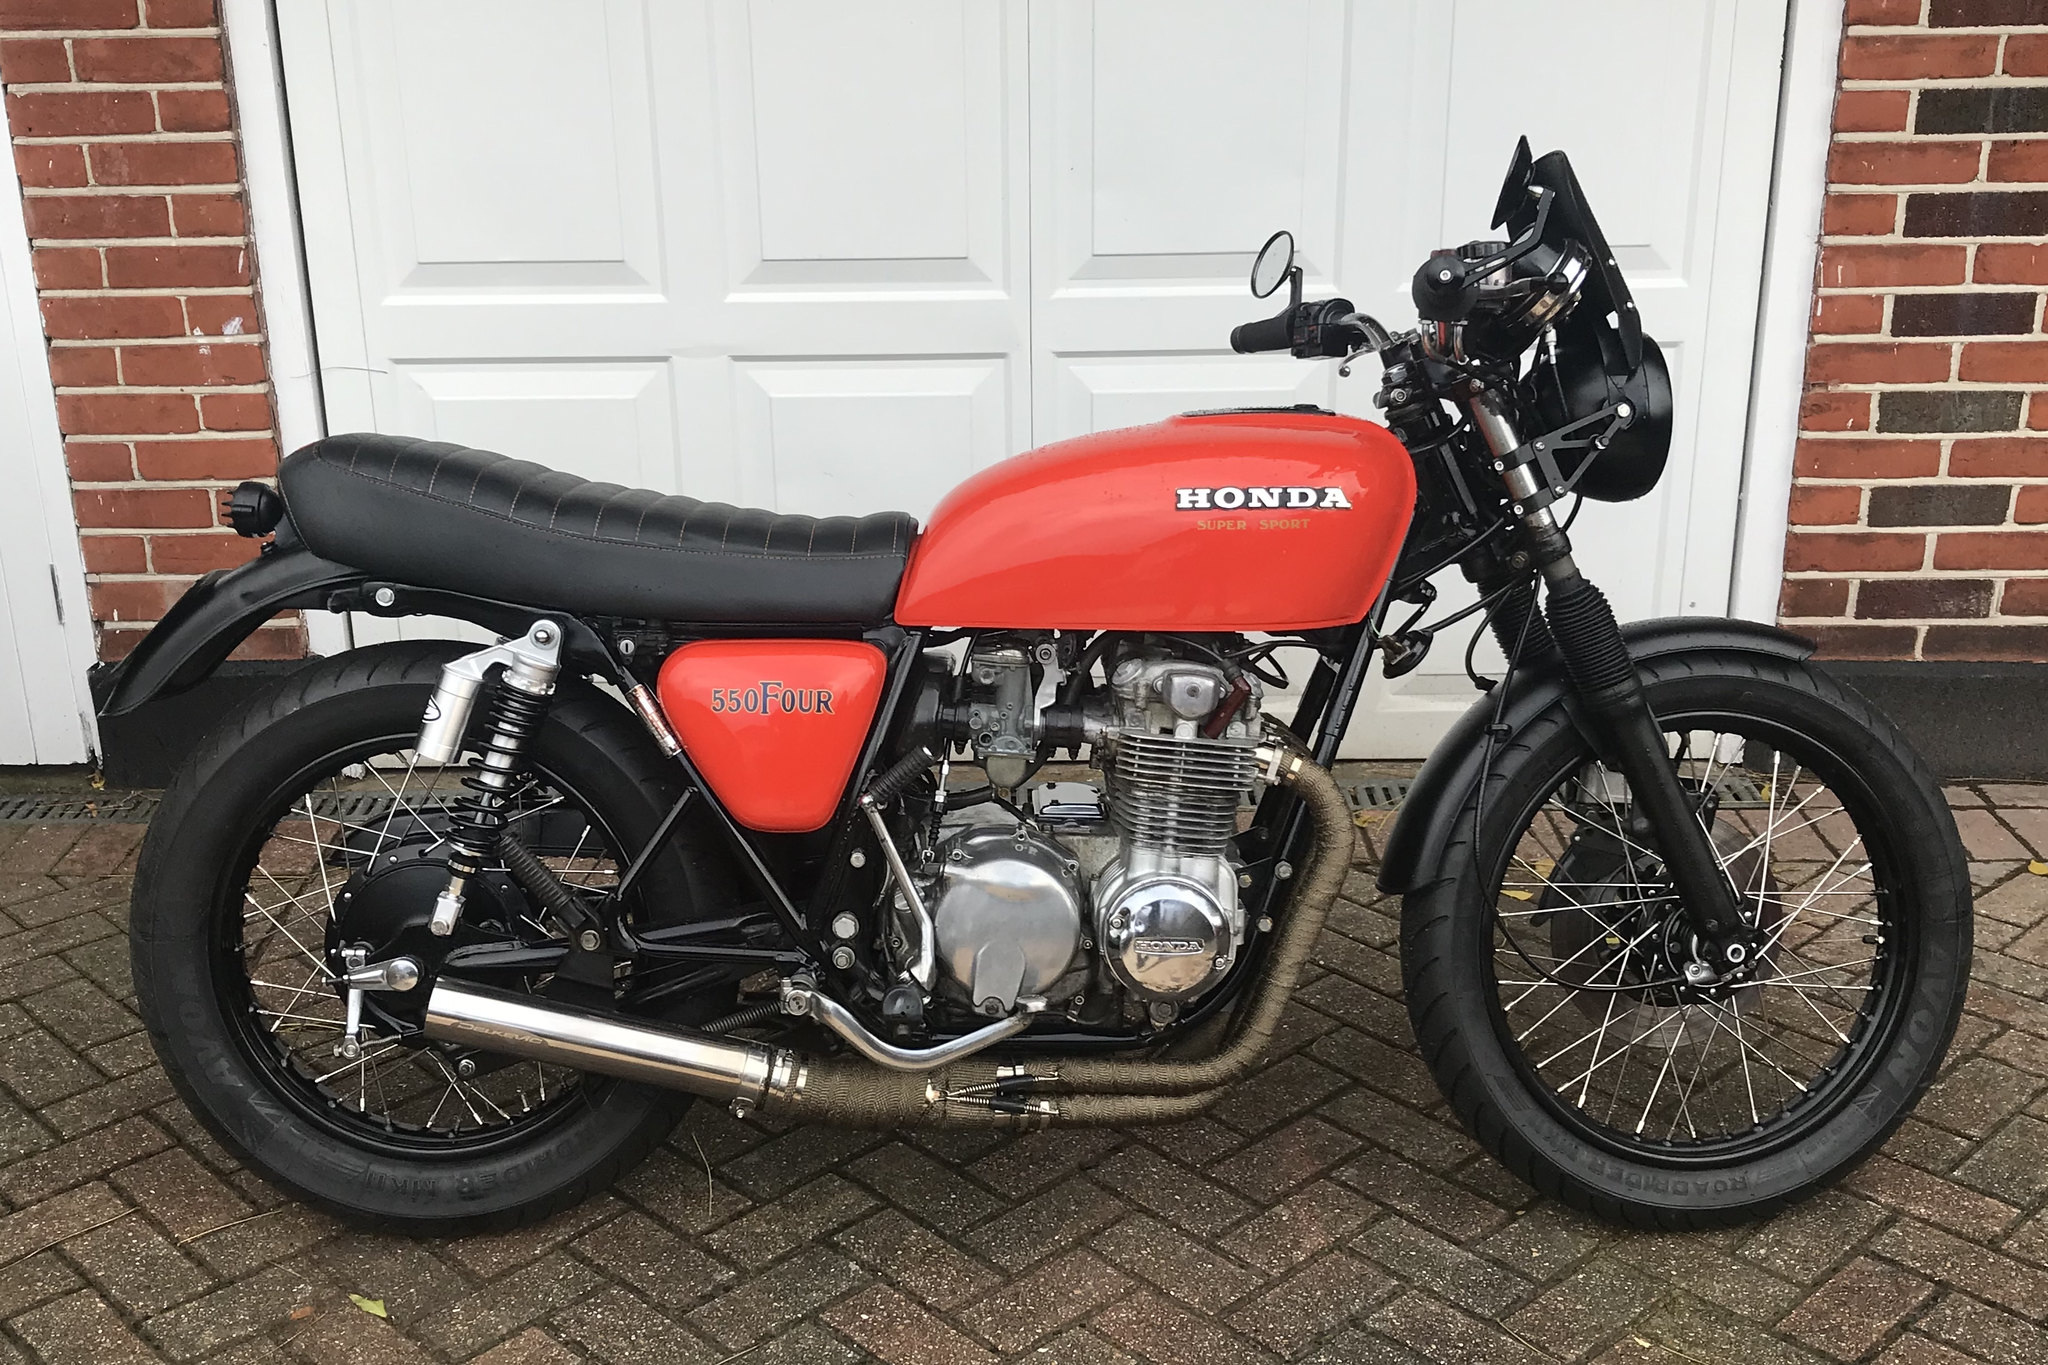 IMG_2211 IMG_2211 by Mark Woodrow, on Flickr
2
« on: November 11, 2020, 10:24:52 PM »
Shouldn't that main stand stop be fitted on the forward hanger bolt?
Not according to the fitting guide, its in the correct location. Not withstanding that it won't work as if you spin it around then the 45 degree piece which extends off with the rubber stop wouldn't mate against the flat surface on the exhaust silencer if that makes sense. I had the same thought as that's clearly where it wants to be positioned to do its intended job...
3
« on: November 11, 2020, 04:32:09 PM »
Thank you for the input regarding the brake setup, duly noted and I'll put it into practice in due course. Having got back home and looked at the bike again I've confirmed that there's must be an issue with how I've rebuilt the MC. With it filled with fluid and the lines being fully disconnected from the brake calliper it doesn't wish to push any fluid through it and the handle provides no resistance. To confirm and as a short term fix I've ordered a replacement MC and will swap it out to confirm and see if I can't get the front brake fully operational. Just been through this post - I like what you have done to the bike it looks really cool a nice mix of modern & classic DNA- the taped manifolds is this to help with heat dissipation? Nice sound on the video.
Lastly I like the B&W plates but as an ex-copper can't see why you think they are legal unless you motor was first registered before January 1973.
Thank you very much, its really nice to hear this as its always my goal whenever I rebuild classic machinery  In theory it should help with the heat, however I'll be honest, I've always just loved the aesthetic and really didn't want to have chromed/stainless pipes that scream steal your attention. As you'll have seen I have tried to really tone down the 70's chromed look. I quite like the slightly more subdued modern/retro aesthetic. I'll unusually confess that like this it is a bit too loud though... As has been mentioned its now perfectly legal being historic vehicle class I've gone for the smallest legal plate and font sizes so that its not an eyesore bolted on like the OEM setup, its basically the same width as the rear mudguard. It certainly helps with the look imo. In other news I'm still battling with the exhaust fitment, so much for bolt on parts! With everything loosened back off I can get the silencer and collector connected and tensioned up however it feels somewhat stressed and they want to be at different angles to each other. Not withstanding this, the rear centre stand rubber stop which comes with the exhaust hanger is situated too far rearwards and therefore does not stop it as intended. Having spent a few hours messing with it, something doesn't add up. I've contacted Delkevic however I'm now wondering whether I've been supplied with the wrong securing bracket? and/or the collector is a dodgy one and not been formed correctly. While I've contacted Delkevic to request assistance however I'd be grateful of anyone else's experience with this system? I presume the rear footpeg mounting hole on the frame didn't alter between the years and revisions of the 550? Some more photos for context: Exhaust fully connected and fitted, however slightly stressed due to the stretch and exhaust header pipes now much further outside of the collector pipe:  IMG_2147 IMG_2147 by Mark Woodrow, on Flickr  IMG_2153 IMG_2153 by Mark Woodrow, on Flickr 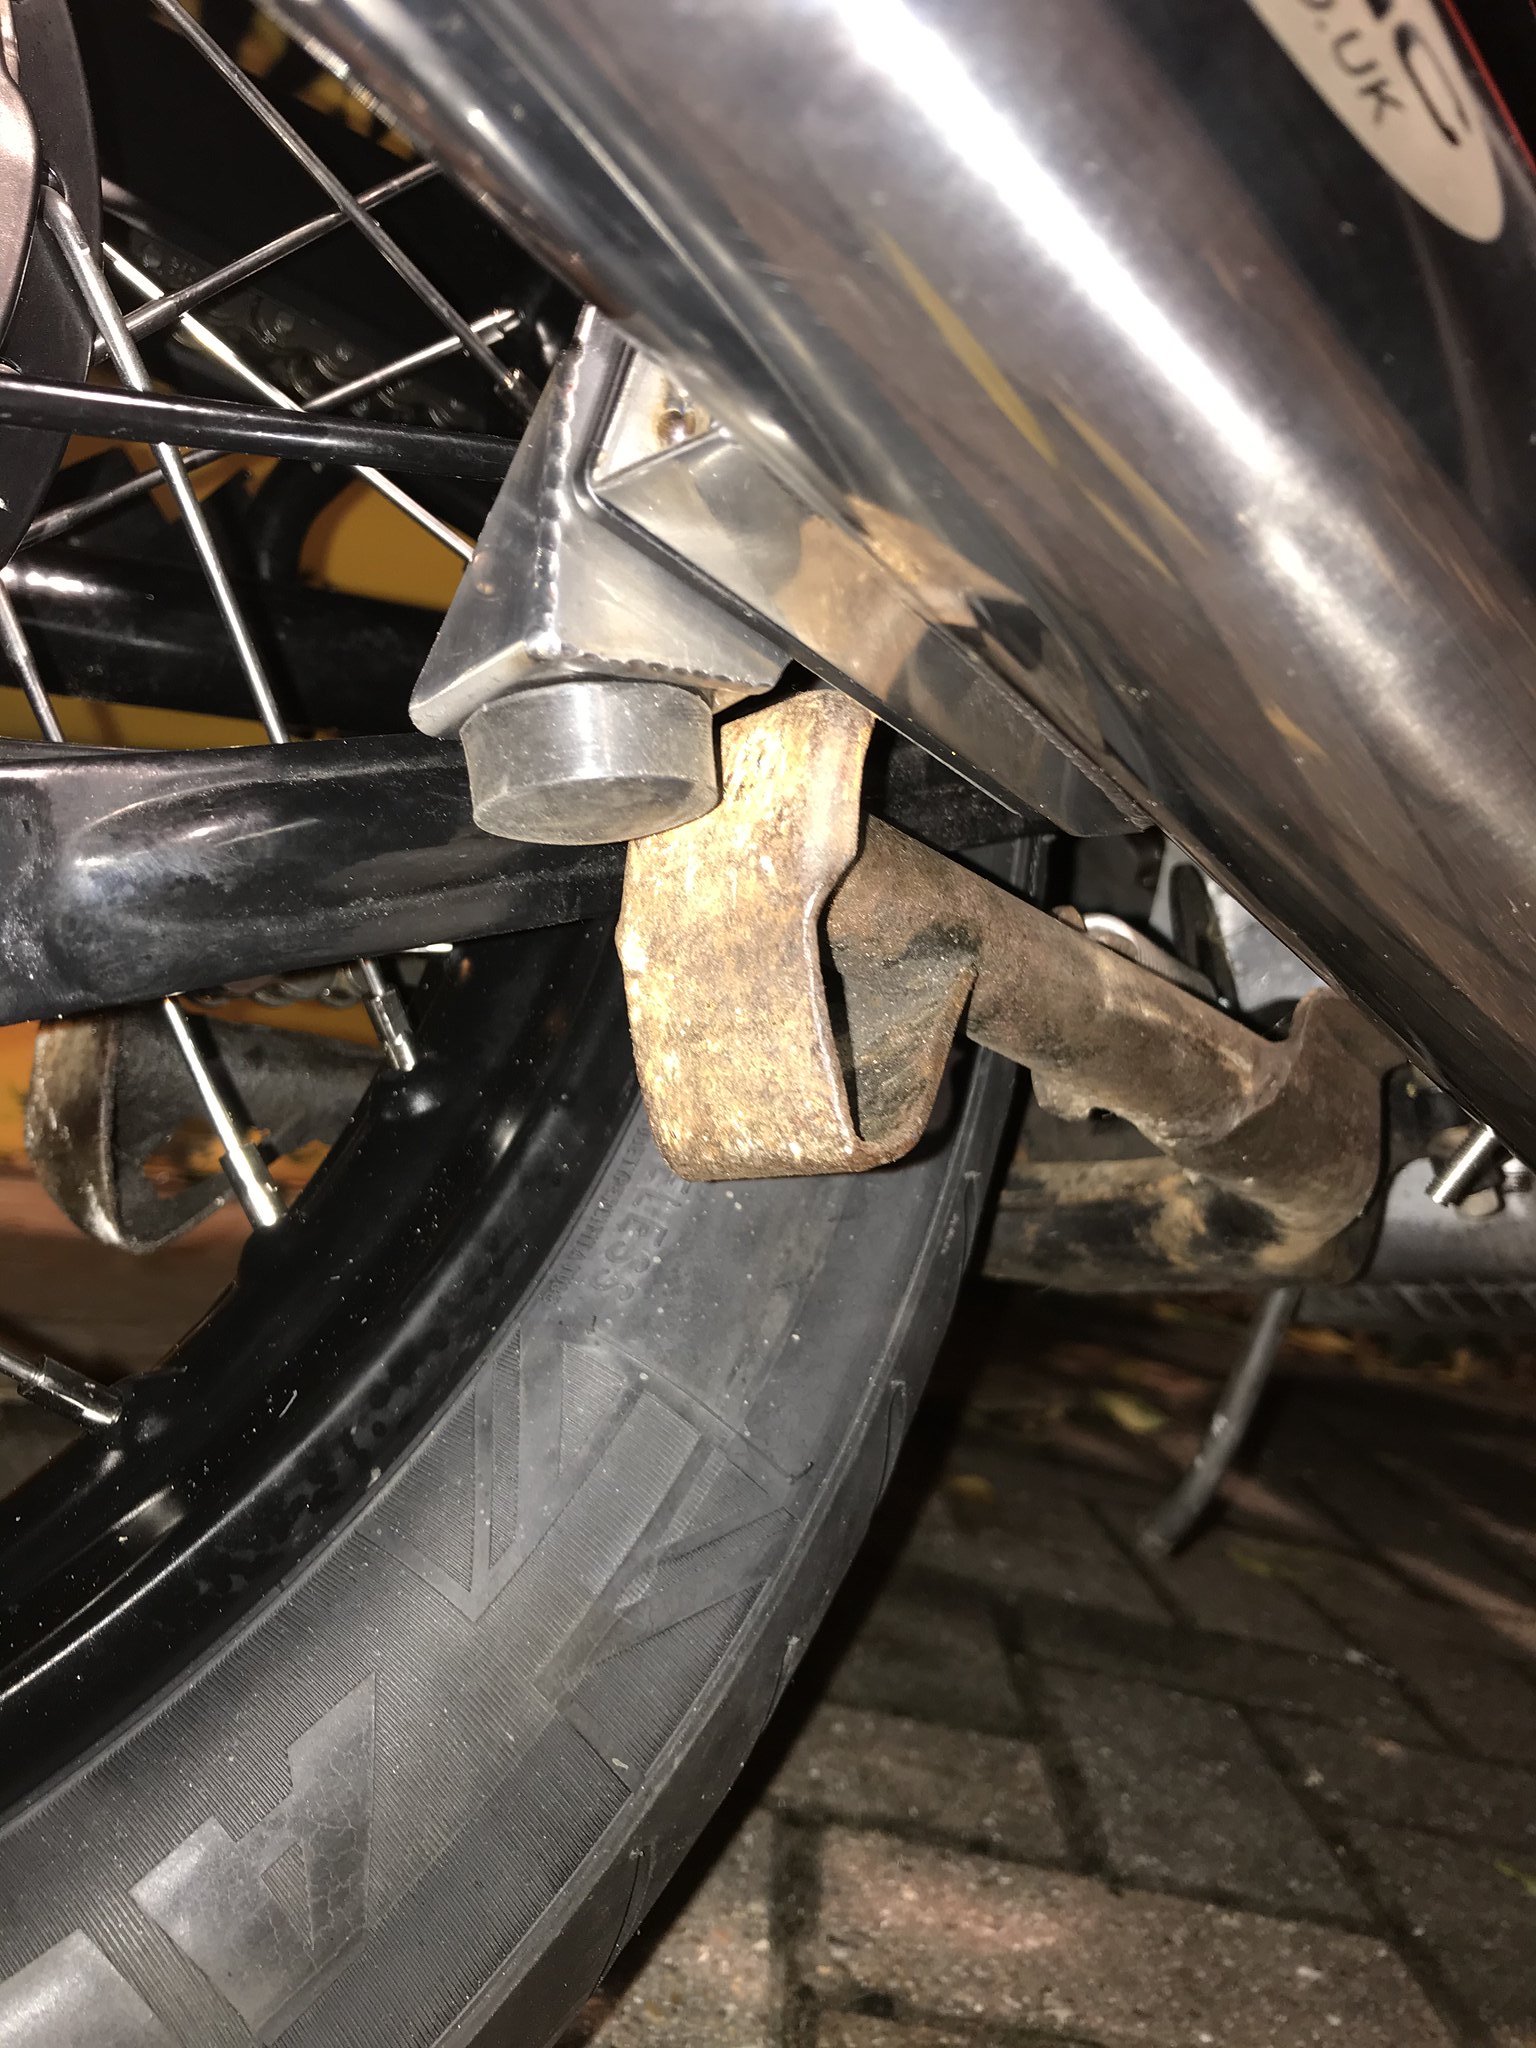 IMG_2148 IMG_2148 by Mark Woodrow, on Flickr Exhaust hanger fitment:  IMG_2155 IMG_2155 by Mark Woodrow, on Flickr You can see the slight misalignment of the collector pipe and silencer here, as you can imagine this will get worse as the silencer is fitted due to its fixed hanger point meaning it has to turn rather than slide as would be ideal: 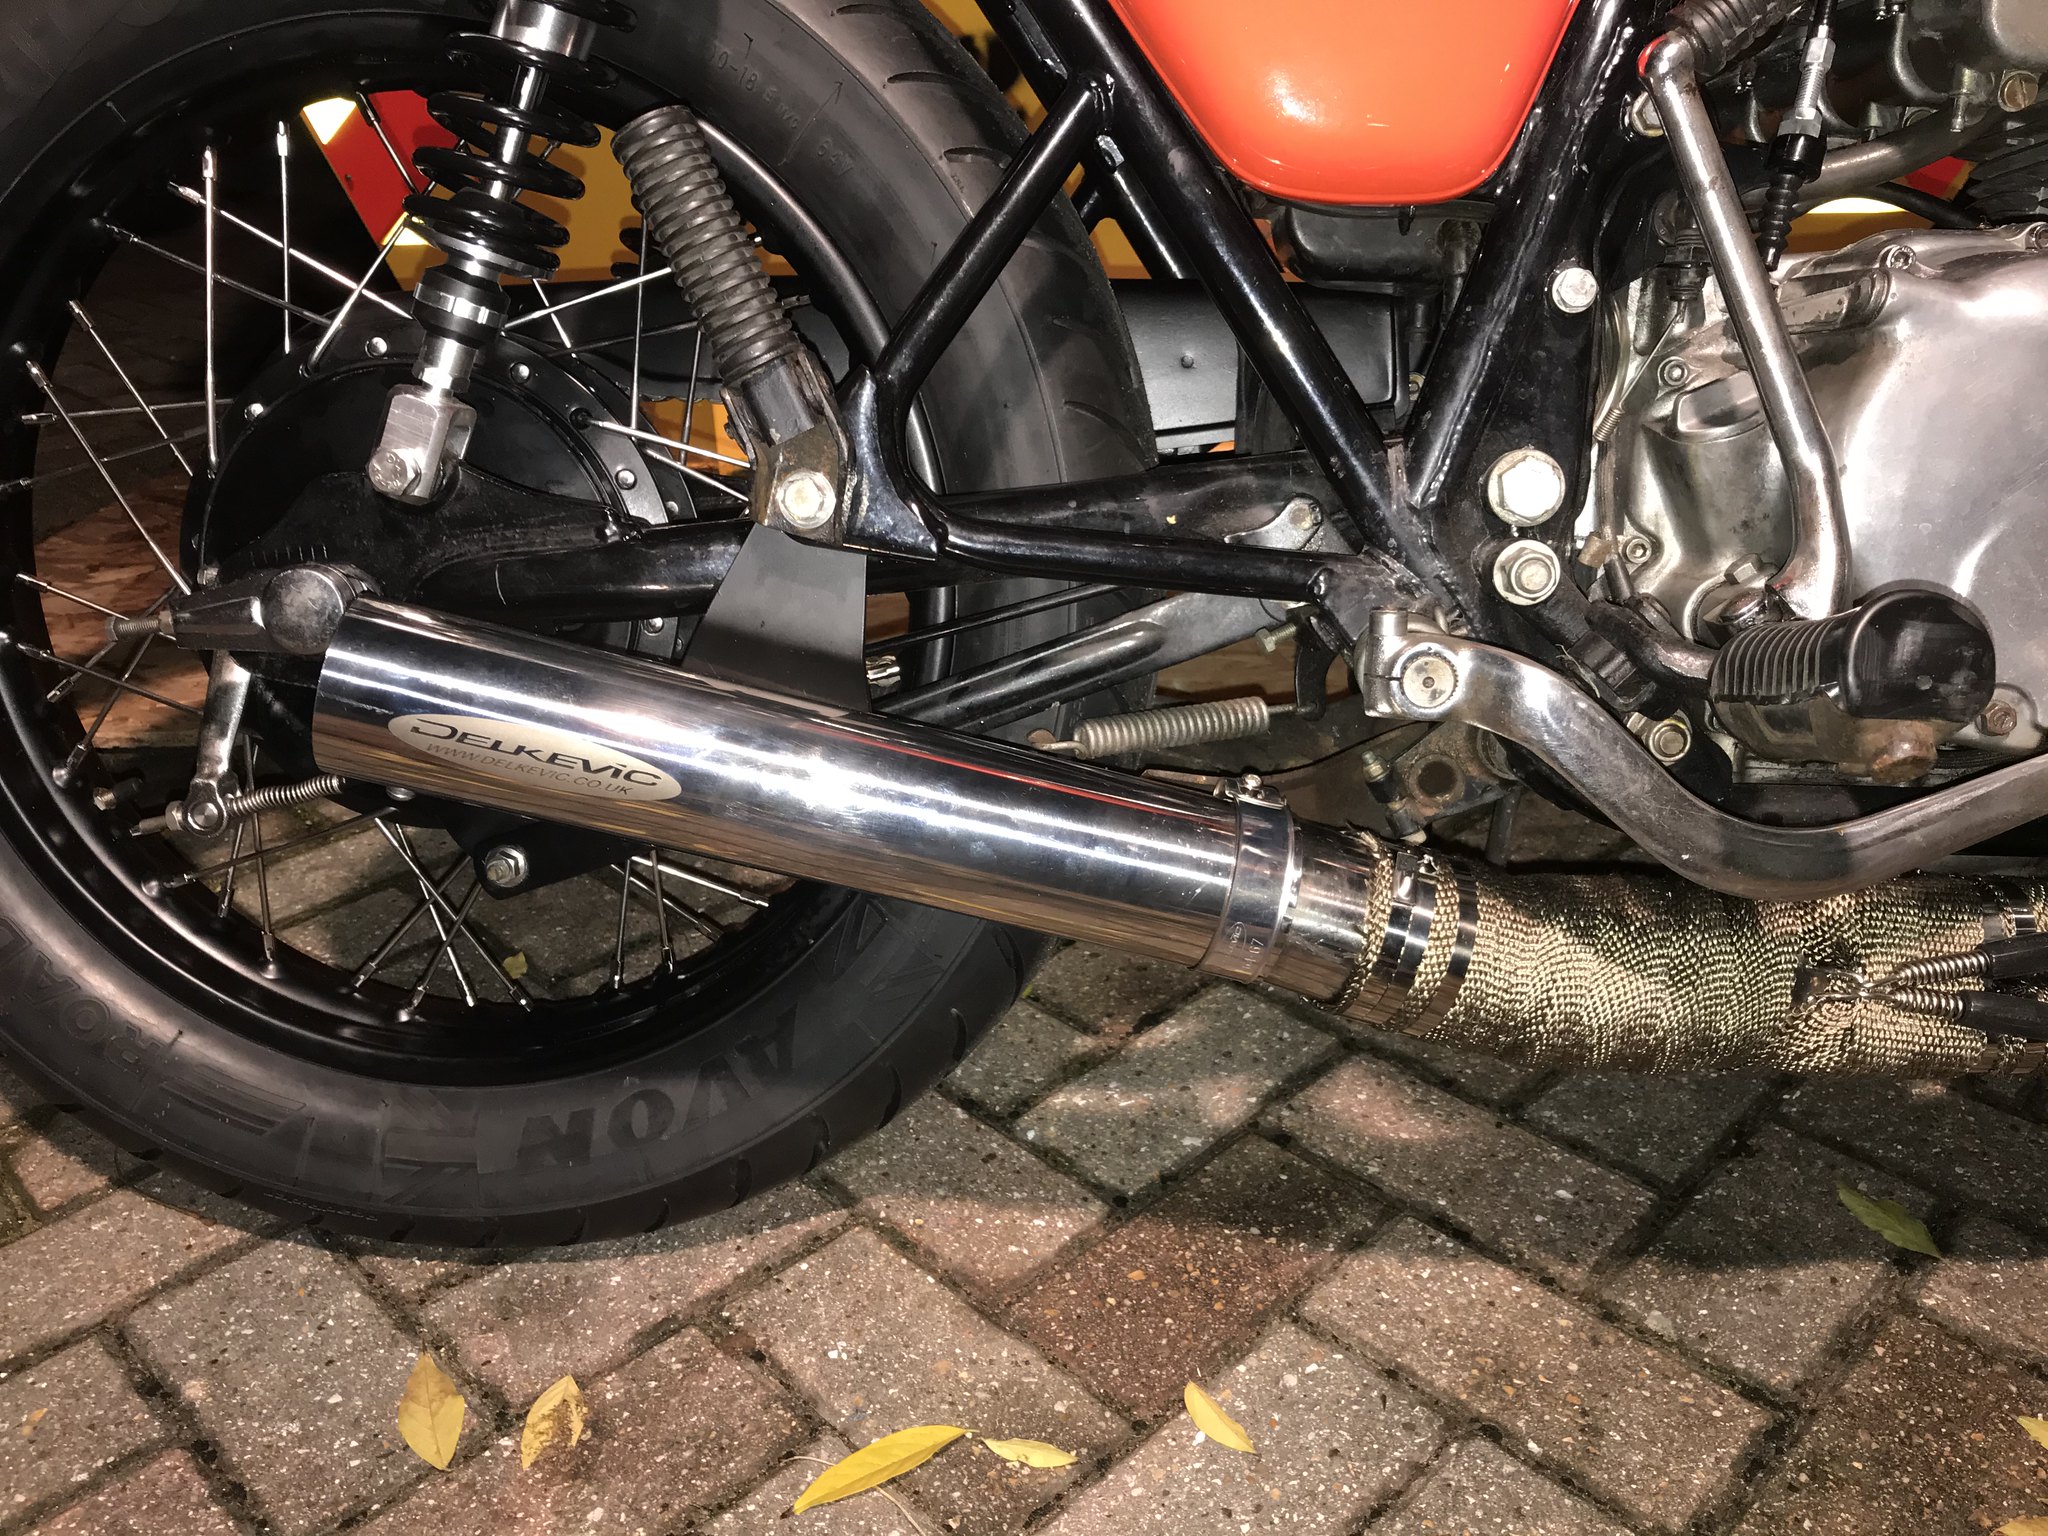 IMG_2156 IMG_2156 by Mark Woodrow, on Flickr
4
« on: November 09, 2020, 09:36:34 PM »
Remove the caliper adjusting screw and see if the brake binds then.
Exhaust, try removing the springs, fitting the end can and then refitting the springs, they could be pulling the Y section too far onto the downpipes and thus pulling the end can forward.
I will give it a go, what's the science of how the adjustment screw should be set? I'm also going to disconnect the MC from the brake sensor terminal and see if I can get fluid to pump through to there to ascertain whether or not the MC is the guilty party or not. Good argument well presented, I may be unfairly over estimating how snugly everything should fit in. I was very keen not to have leaks from the collector from past experience with exhausts. I'd like to think it should be fairly good fitment given delkevics reputation and how many people have them fitted. I'll also give that a go... Nice work. It's looking awesome!
Is this the original seat bowl? Did you cut the frame for that?
Cheers!
Thank you for the words of encouragement It is the original seat bowl which has just had the foam chopped around and been re-profiled a bit more to my taste. I didn't wish to cut the frame of the bike and I also wanted to retain the OEM lock and hinged seat for storage and access. It's still not small but a lot neater than OEM for me.
5
« on: November 08, 2020, 10:12:21 PM »
SIMPLY STUNNING!!!
6
« on: November 08, 2020, 10:07:22 PM »
A quick video to show how its currently running, not the best video however there will be a better one to follow in due course once I've got the braking issues ironed out and the bike roadworthy again. https://www.youtube.com/watch?v=bFP0lmeAOu4&feature=youtu.beCompared the the first video I posted earlier this year where it was sounding very rattly, I'm very pleased with what I've achieved for a first build.
7
« on: November 08, 2020, 09:58:43 PM »
I don’t know the CB550...
But, there seems to be excess thread on the Caliper Adjusting screw leading me to wonder whether the axle and various spacers are orientated correctly.
Recently after servicing the front bearings & cleaning my 400F I was ‘shocked’ at the minimal disc - fork tube clearance, I then noted excess caliper adjusting thread and thought, ‘eh up?’
Embarrassingly I’d fitted the axle wrong way around. Doh.
Pic of the CB400F... MAY NOT reflect the 550. (& ignore my personalisations)
Thanks for the suggestion, that was more a case of me messing around with the calliper adjusting screw to try and work out the fitment. The wheel was rebuilt by a 'professional wheel builder' however you never really know... I looked again the other evening and It appears that I had managed to get the brake calliper mount incorrectly positioned so that it wasn't mounting onto the fender support but instead directly onto the forks. I've since swapped these around and it looks to be much better aligned thankfully! There's been a lot of progress this week however the finishing line has still managed to evade me. The rear wheel has now been rebuilt and fitted up with Julie kindly supplying me with the missing seal. This has meant that I could fit up a new chain, having previously picked up an X-ring chain I ultimately decided against its fitment due to concerns over its size so instead ordered a more standard chain from David Silvers. Having measured the pin widths on both chains I wasn't shocked to find out why the X-ring type chains can start eating away at your engine casing. The new standard chain measured 21.52mm vs the 23.58mm of the X-ring variant! Equally the split pin connection was a lot less hassle... Refurbed chain guard fitted up, chain adjusted to spec and rear brakes adjusted and progress was being made. Sprocket casings fitted back up and wiring tucked away too. On the cosmetic front I was very aware of the height of the newly fitted fly screen which left a large gap between the headlight and looked somewhat ridiculous so this has been chopped down, drilled and refinished to fit more in with the aesthetic. With the bike now off its bricks and fully balanced on its centre stand again, I could finally refurbish the oil filter housing and fill her up with fresh oil so that she's now been fully serviced. Next up and my freshly wrapped Delkevic exhaust could be bolted up, having followed the instructions I have somehow managed to hit somewhat of an inconvenient hurdle with the rear silencer/muffler not being able to be fitted as the supporting bracket does not align with the rear footpeg mount as intended. I have therefore been left with a straight pipe setup while I try and work this one out, a message to Delkevic surely however if anyone can offer any wisdom and experience with this set then it would be appreciated. I'm conscious that I really need to at least get the centre stand rubber stop fitted up if nothing else to prevent any interference with the chain. Time for the moment of truth and after all of my hard work its time for the first start up in months, the battery hasn’t died which is a bonus. Fuel on, choke applied and ignition button firmly pressed with a twist of the throttle for good measure. Thankfully the musical symphony of four cylinders kicking into life responded, holding it on the throttle while adjusting the choke and idle screw and before you know it she’s ticking over happily at 1200rpm. It’s by far the best the bike has run since I picked it up and what’s more there’s no fuel leaking this time. Not quite sure the neighbours were quite as thrilled with the straight pipe as I was… One last task and well nothing quite goes to plan, having expected to easily bleed the front brakes to get the bike roadworthy I have been stopped dead in my tracks. Having opened the bleed nipple, put brake fluid in the reservoir and pumped the brake lever the result was totally disappointing. A few tiny bubbles popped up however nothing was going through the system. The brake lever also has very little in the way of resistance, I'm therefore beginning to wonder whether my master cylinder rebuild has gone pear shaped.... On top of this with the brake caliper bolts correctly torqued the front brakes are locked solid and the front wheel therefore seized. In order to get me from the garden into the freshly emptied garage at the front of the house I’ve had to loosen off the brake calliper to allow the wheels to rotate freely. Any suggestion on trouble shooting would be much appreciated? I’m assuming that the calliper will be totally fine as it was a very straight forward rebuild, the junction with the brake sensor equally was only cleaned and reassembled so I’m looking to blame the master as I had a total battle rebuilding it and now the lever offers little in the way of resistance… Equally now that its off its centre stand, I really need to get it off to fully refurb and refinish it as its certainly looking very shabby next to the rest of the bike and probably long over due some TLC. On a more positive note, here’s some photos of where it’s got too. Its totally transformed since May and for the first time in months is rolling on its new shoes and finally getting close to its finished look. Safe to say that I’m eagerly anticipating the test ride in due course!  A7839887-3C4C-4119-B7E8-C49E48A5B6AC A7839887-3C4C-4119-B7E8-C49E48A5B6AC by Mark Woodrow, on Flickr Problem Identified!  IMG_1960 IMG_1960 by Mark Woodrow, on Flickr  IMG_1957 IMG_1957 by Mark Woodrow, on Flickr  IMG_2015 IMG_2015 by Mark Woodrow, on Flickr  IMG_2019 IMG_2019 by Mark Woodrow, on Flickr  IMG_2033 IMG_2033 by Mark Woodrow, on Flickr  IMG_2059 IMG_2059 by Mark Woodrow, on Flickr Spot the issue here!   IMG_2062 IMG_2062 by Mark Woodrow, on Flickr Front end all tidied up  IMG_2072 IMG_2072 by Mark Woodrow, on Flickr  IMG_2095 IMG_2095 by Mark Woodrow, on Flickr  IMG_2096 IMG_2096 by Mark Woodrow, on Flickr  IMG_2088 IMG_2088 by Mark Woodrow, on Flickr  IMG_2093 IMG_2093 by Mark Woodrow, on Flickr
8
« on: October 29, 2020, 11:01:42 PM »
I'm not really an OEM kinda guy but wow! Just wow!! This is stunning The attention to detail you've given this build is amazing, really making me think about all the bolts and aged fixtures or fittings that I've just sympathetically restored and left due to additional cost.... Really looking forward to seeing the finished product, keep up the good work.
9
« on: October 29, 2020, 10:51:14 PM »
It looks like the wheel is in the correct place but the guard is sitting to one side. You have probably just fitted the guard fixing point on the wrong side. Post a pic sometime.
Thanks Julie, that could well stack up. I'll have to take a look again next time I'm home and take some photos or see if I can work it out!
10
« on: October 29, 2020, 07:21:59 PM »
No problem to swing by, will be good to exchange notes, just send me a PM.
Thanks for the info on the seat,
Sounds good, hopefully it won't be too much longer and I'll be able to road test so I'll let you know. In other news I have made the first bit of progress in a long time today. I've now reassembled and fitted the front wheel to the bike and what it difference it has made phycologically! That said it does appear to be out of alignment with the front fender, any ideas from anyone?  IMG_1852 IMG_1852 by Mark Woodrow, on Flickr I've also (hopefully for the last time) refitted the carbs up, refitted the airbox, and fitted the reupholstered seat. A missing O ring seal has held me back from getting the bike completely back down on its new shoes however it's really nice to see the new aesthetic coming together. I know it won't be everyones cup of tea but I'm really liking its stealthy look having lost a lot of the chrome and done some modernisation. Looks like the remaining short list is to: (subject to a million other headaches  ) - Rebuild Rear Wheel - Fit the new chain - Bleed/adjust Brakes - Change Oil - Fit up the new exhaust  IMG_1828 IMG_1828 by Mark Woodrow, on Flickr  IMG_1849 IMG_1849 by Mark Woodrow, on Flickr  IMG_1857 IMG_1857 by Mark Woodrow, on Flickr
11
« on: October 17, 2020, 03:07:11 PM »
This looks like a very familiar story, really nice to see it being brought back to life! It's amazing how much can be hiding in places, but really impressive what you can do to bring the chrome back up. Be sure to have a thorough going over of the wiring, its scary what I've found in places and the honest thing would be to just replace the lot now however that'll be waiting as a future project. What are your plans for the restoration? Just being mechanically sympathetic and getting it back on the road in good order or more serious ideas?
12
« on: October 17, 2020, 03:01:05 PM »
Mark
Looks like you are doing a cracking job, and I will watch with interest.
I am not far from you near Epsom, and have just started a thread on my CB550k restoration.
Could you let me know who did your seat, that looks great.
Cheers
Thanks Matt, hopefully its about to get more exciting as it really comes together and reaches the open road again! What a small world, I used to go to school in Leatherhead and play rugby against Epsom so know the area well. I'll have to take a look at your build however if you ever fancy kicking tyres and saying hi then don't be a stranger. Maybe I can swing by on the bike once I'm back on the road if you fancy it and subject to all the new rules etc? The seat was done by these guys, their work seems to be very impressive. Have a word with Matt, he's a really nice bloke and into classic cars too. I could have gone far more sculpted and bespoke shape wise however I didn't wish to cut the frame at this stage and liked the idea of retaining the factory lock and mechanism for access. Fingers crossed it looks as good once its been fitted back up! https://www.herbertellisonupholstery.co.uk/upholstery-services/motorbike-seat-upholstery/
13
« on: October 16, 2020, 04:59:59 PM »
OK, it's in 550F1 trim but you say it's a 1978 bike?
I bought an F2 SuperSport in blue metallic on 2nd August 1977 and still have it. It's in standard original trim, not repainted etc. Photo taken 2 weeks ago for you to compare. The seat is also now back to standard.
Cheers, Dick
Sorry for the slow reply, this has been on total hold while I've been riding across Europe for the last 30 days. 9 countries and 5000km so not bad going in the current environment! I picked up a Honda CB500X for the trip which was absolutely mega, super reliable and have already agreed its sale today. That is correct on both counts, I can't quite understand it myself. It definitely looks to be an F1 based on my limited knowledge and other more experienced members input however it's also definitely registered as a 1978 bike so I have no idea... It looks like you've got yourself a really tidy bike there! Fingers crossed more progress is going to be made imminently, having returned to the UK I've finally picked my wheels back up fresh from a total rebuild. I need to give a huge shoutout to Trigger on here who rather generously saved my rebuild. It turned out that my rear drum brake liner was totally buggered, cracked in five places and had a hole in it. It was in fact so bad that it had to be scraped, thankfully though Graham sorted me with a replacement and turned it around incredibly quickly. I have to say the wheels do look the dogs bollocks in my opinion having been finished in satin black with stainless spokes, photos to follow soon as I start piecing the bike back together. I'm keeping fingers crossed that I've now got what I need to get it all back together and fingers crossed get back on the road just in time for winter! Tomorrow I'll also be picking up my seat which has been totally customised and re-upholstered, not one for the purists however from the photo I've been shown I think it looks mega and am looking forward to getting it fitted back up to the bike. More progress to follow shortly I hope, I just need to remember how everything goes back together now   IMG_1120 IMG_1120 by Mark Woodrow, on Flickr
14
« on: August 03, 2020, 12:34:13 AM »
I will have to go to my lockup and see what is what
That's much appreciated Bryan, timescale wise you're my only good hope now! I've spoken to Trigger who's confirmed he can do the work however sadly (albeit rather understandably) my timescales aren't very realistic so I'm a bit screwed with my plans. Still definitely going ahead to get the job done though and he's been very accommodating. Thanks for the suggestions to the other linked wheels via ebay, its much appreciated. As much as I'd like the hub fixed yesterday, I really don't wish to throw money at something just as old with potential for similar issues either immediately or in the near future given its a known issue with our bikes due to their age now. Particularly given its such a crucial safety feature! It also sounds highly likely that those hubs wouldn't be correct for my 550 based on the above comments, this is where I'm very grateful of all of your guidance given my lack of knowledge and experience with these bikes.
15
« on: August 01, 2020, 05:57:27 PM »
PM to Trigger on here as I believe he's equipped to reline these hubs, you'll soon find out though 
For material, people are using new suitable sized car drums as a scource and produce a liner to fit from correct grade for this purpose.
I'll drop him a message, thank you. Can you get a temporary spare wheel fitted so that your road trip can still happen...?
Sadly I don't have any alternatives and was getting new wheels built to hopefully avoid any issues. You never seem to know whats lurking underneath these days given that everything could be 40 years old, so I don't wish to throw good money at another unknown on the hopes that... I'd spend some money getting it done right now rather than pay the consequences later, particularly given its one of my only two points of contact.  What actual bike is it for? I still have one of the three i had done somewhere, cont remember if its wheel or just hub, you might be able to convince me to loan it out if its the right one and as long as i get one back with good drum dont care if its yours or mine
1978 CB550 F1 You have my attention, I'd bite your arm off if you'd be happy to loan me a rebuilt one to finish my wheels! Obviously on the basis that I have my rear hub rebuilt and returned to you in exchange, happy to add a little sweetener in there too. Let me know what you've got. Sadly time is working against me...
|

