This section allows you to view all posts made by this member. Note that you can only see posts made in areas you currently have access to.
Messages - woody928
16
« on: July 31, 2020, 10:16:19 PM »
Evening All, I had some really bad news earlier regarding the rebuild of my wheels. When the hubs came back from shot blasting it was noted that the rear brake drum lining had hairline cracks in four separate places and is buggered. What are my options as to how to proceed? I can't see that off the shelf replacement hubs are available and from my research I can't seem to find anyone easily who can reline a brake drum. It's clearly a specialist job from the looks of this and a known issue given Ken's previous warnings to me. What have others in this position done? I have told the wheel builder to hang fire over the weekend before proceeding any further with painting the hubs and rebuilding the wheels. Is this something I should be fixing while the hub is dissembled in its current state? or am I able to get this done having had the wheel rebuilt? The wheel builder was suggesting that it was better to rebuild the wheel and then sort this post rebuild. To make matters worse I was hoping to have the bike back on the road within the next month for a big roadtrip however I'm guessing that will be a no go given the issues at hand. I"m happy to throw some money at it, I just need it done...  For what its worth I'm in the SE of the UK, Surrey way however also happy to travel a bit.
17
« on: July 31, 2020, 10:06:40 PM »
Nice finish on the forks and mudguards, looks great, hope all goes well
Thanks man, much appreciated  Your too far from me to buy the exhaust im affraid
If you're interested then I'm more than happy to bubble wrap and post it, if not then no worries, I'll advertise when I find some time. Here is my delkevic 😎 they are awesome and great value.
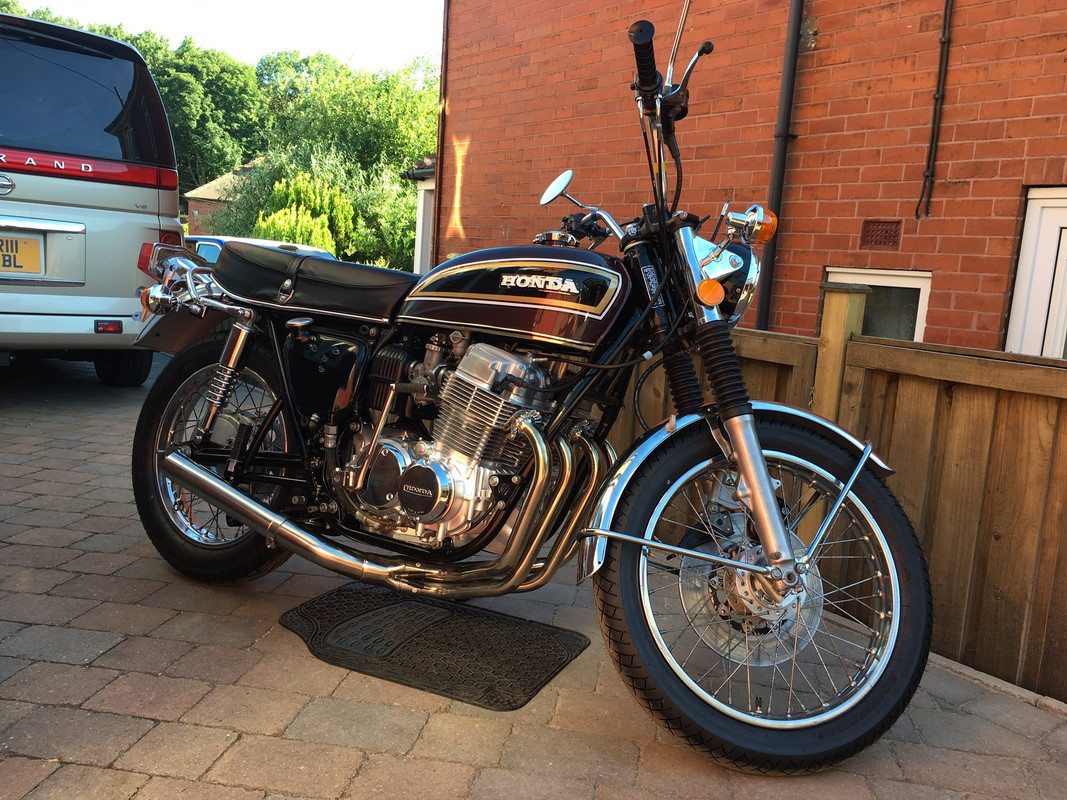
They do look mega I must say! Nice bike you've got yourself there, CB750?
18
« on: July 27, 2020, 09:56:41 PM »
Don't worry I’m nor a purist, each to his own is more my view.... Looks like you have plenty to keep you busy there... shame about the Marshall pipe, I’ve no idea of its value but it must be very rare to find one in that condition, it would suit anybody who is trying to build a special but in the 80’s style.... I haven’t seen one fitted to a classic honda for decades and I’ve certainly looked at plenty in the last few years...
Refreshing to hear, I know people have strong opinions in the vintage community. I guess my plans are somewhat odd in that I'm not going OEM or cafe/brat etc anyway. It seems never ending sadly! Thanks for the info, I hadn't appreciated it was a period and unique piece. The dent to the pipe is certainly a great shame and something I hadn't noticed at the time. I'm hoping to find a new owner who will appreciate it and put it to good use, soon to be up for grabs anyway. The delkevic that I've picked up certainly seems the business for me at least.
19
« on: July 25, 2020, 02:37:10 PM »
With the old exhaust fully stripped off the cleanup has begun, everything looks very sooted up and I'm not sure whether there is a slight oil leak showing from the cylinder head potentially looking at the below photo?  IMG_9020 IMG_9020 by Mark Woodrow, on Flickr  IMG_9025 IMG_9025 by Mark Woodrow, on Flickr The studs could have been far worse however they still gave same fight having been painted in place for some extra resistance. I'm grateful that they all came out in one piece before it was too late. I'm keeping fingers crossed that the new stainless ones with some copper slip will avoid any headaches down the line.  IMG_9023 IMG_9023 by Mark Woodrow, on Flickr I'll certainly be doing a little clean up before the new copper crush gaskets ands exhaust gets bolted up. In other news, I was very aware how basic the rear suspension felt on my original ride home several months ago now. Clearly something was needing to be done. Being a bit of a tart I wanted something more adjustable given that I have various different uses planed and have therefore picked up a set of TEC's fully adjustable rear shocks. Time will tell whether they are any good or not but they certainly look the part.  IMG_8928 IMG_8928 by Mark Woodrow, on Flickr Having now cleaned up the back end of the bike in most other respects and being conscious of how uncomfortable old bike seats can be I've decided to send off my seat for some TLC. I wanted to retain the originality of the mechanism and didn't wish to cut or weld the frame in the event that someone wishes to revert the bike back to standard one day. That said the seat will be being spruced up to give it some more character, lower the profile and improve upon the comfort significantly. I'm very excited to see howe this turns out, but have total faith in the company that its been sent to having seen their other work. The carbs were fully reassembled a couple of weeks ago. Id be lying if I said that a lot of patience was not involved. It was rather painstaking getting it all just so, bench syncing the carbs and also resetting the float heights to get it all just so. Despite this I still managed to pinch the O ring seals on the fuel pipe for carbs 3 and 4 causing a fuel leak having fully rebuilt the carbs and got them on the bike. Thankfully those have now been replaced with a huge shoutout to Julie of here! I also decided to replace the damaged main jet on carb one for peace of mind so there should be no dramas there. It was incredible what a difference it made to the bike on first startup even with no proper vacum sync or balance. I'm pleased to report that it is sounding so much healthier so I'm feeling a lot better. Exhaust to go on next to finish that area up. This is where the bike currently stands, its felt like one step forward, two backwards throughout and I've gone so over budget and more carried away then anticipated however I'm hoping it'll be something that I'm very proud of and really enjoy around Europe come September. I've probably missed a lot however that gives you the headline pieces I'm sure and I've already written too much   IMG_8940 IMG_8940 by Mark Woodrow, on Flickr
20
« on: July 25, 2020, 02:11:21 PM »
This moves me onto my fenders, I'm sure this will meet with distain from certain people. Both had seen much better days with the underside of both appearing to have been totally battered by rust. An aggressive assault with wire wheels was therefore necessary to beat such an enemy back before converting what metal was left with Dinatrol rust convertor. This proved too much on one section on the rear bumper which actually went all of the way through  The chrome on top of both was on closer inspection pretty pitted and worn out so I didn't feel bad about my decision to paint them. In all honesty I would have been starting again with new if they were staying. The front fender was been slightly chopped and ground down on the front and rear to shorten it and remove the extra supports. I'm hoping this gives me a more modern aesthetic while retaining functionality and stays as the front fork brace. In the end I as pretty happy with the results. The rear got a very similar treatment however its remained its full size to hopefully keep me drier in the event of foul weather, particularly considering that I plan to tour Europe on it. All of the huge OEM lighting has been removed to make the way for much smaller modern and brighter LED lighting which I prefer for a number of reasons. Efforts have been made to reuse all of the holes where possible and wiring points so my new tailight is nestled perfectly over the rubber wiring grommet. Some new LED indicators have however been cut neatly into the side of the fender and are almost unnoticeable until turned on. They're incredibly bright and look great I think. One of my biggest cosmetic victories has been the removal of the hideous old number plate and replacement with a smaller (legal) historic plate. The rear of the bike is now far more to my taste and dare I say it, modernised it hugely.  IMG_8548 IMG_8548 by Mark Woodrow, on Flickr  IMG_8690 IMG_8690 by Mark Woodrow, on Flickr  IMG_8696 IMG_8696 by Mark Woodrow, on Flickr  IMG_8697 IMG_8697 by Mark Woodrow, on Flickr  IMG_8689 IMG_8689 by Mark Woodrow, on Flickr  IMG_8679 IMG_8679 by Mark Woodrow, on Flickr  IMG_8730 IMG_8730 by Mark Woodrow, on Flickr  IMG_8588 IMG_8588 by Mark Woodrow, on Flickr  IMG_8720 IMG_8720 by Mark Woodrow, on Flickr  IMG_8875 IMG_8875 by Mark Woodrow, on Flickr  IMG_8801 IMG_8801 by Mark Woodrow, on Flickr  IMG_8867 IMG_8867 by Mark Woodrow, on Flickr
21
« on: July 25, 2020, 01:53:59 PM »
Well I'm long overdue an update here My experience tells me that replacing even for new Oe ones is best done before they get too bad, they tend to snap off flush with the head as that’s where the majority of the rust is and being so close to the head you normally don’t see it until it’s too late.
As you can imagine getting one out when it’s snapped off flush is not easy
Advice has been heeded, I've not got all of the original exhaust studs out and have already received replacement stainless ones from the suggested link. I just want to run a tap through the threads to clean them up before putting the new stainless ones in. Wow missed this thread but the bike in the first photo’s looks fantastic... i always liked the look of the F models even though I actually owned a K3 back in the day... that marshall pipe is in deed a period item and looks to be in amazing condition i hope you decide to keep it but it must be worth a few bob if you dont..?. I had the exact pipe on mine and it did sound nice, not too loud. 
Thank you very much, I fear you may be about to be disappointed on a couple of fronts, particularly if you're more of a purist though The exhaust has actually just been removed, the style/fitment didn't fit in too well with the style of build I was going for. As shame as it did actually sound really good. It's in fantastic condition for its age with the exception of a dent to the underside on the pipe on cylinder two which clearly had an argument with a kerb at some point during its life... Any ideas on what it may be worth? I'm certainly open to selling it now that I've received a sleeker Delkevic system to replace it.  IMG_9027 IMG_9027 by Mark Woodrow, on Flickr  IMG_9013 IMG_9013 by Mark Woodrow, on Flickr  IMG_9017 IMG_9017 by Mark Woodrow, on Flickr Over the past few weeks I've now managed to fully rebuild and reinstalled the front forks, at the same time the new aftermarket 7inch headlight has gone on with a CNC'd sleeker mount to remove the big factory sleeves. The electrical system has needed a fair bit of TLC in places with some horrendous work completed by the PO. Knackered connections or wires twisted together with a bit of electrical tape seem to be a staple, however all being well I've corrected everything with crimped brass bullet connectors.  IMG_8435 IMG_8435 by Mark Woodrow, on Flickr  IMG_8954 IMG_8954 by Mark Woodrow, on Flickr  IMG_8459 IMG_8459 by Mark Woodrow, on Flickr  IMG_8460 IMG_8460 by Mark Woodrow, on Flickr The front disk brake caliper has been stripped and rebuilt with new seals and repainted. There's new HEL braided lines and EBC pads to hopefully improve the feel of things too. While there I've also stripped and rebuilt the MC so short of bleeding the system they're new, I'm hoping my brakes will be working slightly above their optimum!  IMG_8422 IMG_8422 by Mark Woodrow, on Flickr Continuing along the electrical theme I've installed the NOS switch from Ken which looks so much better then the aged US market switch that had been fitted. The problem is that its now made my other switch show its age!  IMG_8660 IMG_8660 by Mark Woodrow, on Flickr  IMG_8675 IMG_8675 by Mark Woodrow, on Flickr With the front rim off, I got it stripped down to assess where I was looking at my options for a basic refresh before getting the new tyres fitted. Safe to say I was a little horrified to discover this when I finally got the old tyre off!  IMG_8657 IMG_8657 by Mark Woodrow, on Flickr  IMG_8770 IMG_8770 by Mark Woodrow, on Flickr  IMG_8602 IMG_8602 by Mark Woodrow, on Flickr  IMG_8765 IMG_8765 by Mark Woodrow, on Flickr  IMG_8768 IMG_8768 by Mark Woodrow, on Flickr I wire wheeled the rim however having looked at all of the rust, looking at a few bent spokes, surface rust on others and shot bearings and retainers, I've decided that none of it was worth risking my life on. I've now sent both rims off for full rebuild. The hubs will soon be clad in new rims with stainless spokes and have all new bearings and tyres to boot. I've keep the stock rim size on the front however decided to bump up the rear to accomodate my 4.0 tyre more comfortably. I wanted to look at bigger rims for more available tyre sizes but really didn't wish to run into fitment issues down the line so left it as 1.85 front and 2.15 rear. Fingers crossed that they'll be back in a couple of weeks to refit!
22
« on: July 14, 2020, 11:24:59 PM »
Just to close this off and update you all, I've requested the following size rims be built for my 550 with my Avon Roadriders:
19 - 1.85 Front
18 - 2.15 Rear
I decided that I didn't want any fitment issues and am ultimately building the bike with performance in mind. I've spent hours wasting time researching wider rims looking at what may be best. The only last temptation was to go to a 2.15 on the front but I don't get the impression that it gains me anything...
Thanks for the wisdom.
23
« on: July 14, 2020, 09:20:40 PM »
I found the handling to be perfect with 2.15 rims front and rear, it stops rim creep on the tyre when using wider tyres than standard.
Thanks for the input Ken, that's good to know 
24
« on: July 14, 2020, 12:48:55 PM »
I doubt the mods will improve the handling.
Sent from my SM-A750FN using Tapatalk
As us Ex racers know John, It is down to the surface, how skillful the rider is and wider rims don't make any difference whatsoever 
Haha I have no doubt, I just wanted to make the most of the opportunity while I’m starting again from scratch. Ultimately I want the bike to handle correctly first however if I can improve on the aesthetics then why not....
25
« on: July 14, 2020, 12:47:38 PM »
Can not see any mention on fitments to any SOHC's on the Avon site 
With 2.15 rim and a 4.00 tyre, you only have a 10 to 15mm clearance between the tyre wall and the torsion bar. Any wider on the rim the tyre wall will be wider when inflated
Point well made, I’m here to listen to the pros. Would there be any benefit or fitment issues with going 2.15 on the front? It sounds like it’s prudent and sensible to stick to 2.15 on the rear from all of your comments. I was just looking for the most suitable rim for the tyres given the opportunity to change them and also thought aesthetically they’d fill the rear a little more. From what you’d said, it’s a certain that there would be rubbing issues...
26
« on: July 14, 2020, 08:30:59 AM »
For a 3.25 tyre, you would require a 1.85 rim which can take up to a 3.50 tyre. And for a 4.00 tyre you will require a 2.15 rim. The clearance problem is not the frame its, the torsion bar
Looking at Avons website for these tyres it’s suggesting bigger rims, seeing as I’m going custom anyway would it not be advisable to follow the manufacturers specs? Assuming the above quoted sizes would fit that is? I know that combo your quoting would work on the minimum reccomended widths but I thought I should go for the optimum setup given the choice, no? Would I run into issues with a 2.5 rear rim? https://www.avontyres.com/en-gb/tyres/roadrider-mkii?cartype=motorcycle
27
« on: July 14, 2020, 01:30:31 AM »
Hi All,
If I'm having my wheels rebuilt and getting new rims at the same time, and I'm planning to go wider to accommodate more modern rubber.
I've got 3.25 - 19 and 4.0 - 18 Avon Roadrider Mk2 Tyres. Looking at Avon's websites I really want wider rims for better fitment.
I'm planning to go up to a 19 - 2.15 rim up front, and would like to go up to a 18 - 2.5 on the rear. Will the rear wheel clear the frame and chain etc at 2.5? I think it will but would love some confirmation before pulling the trigger.
Many thanks in advance
28
« on: July 01, 2020, 11:41:03 PM »
No worries Ken, they've now been received with thanks! I'll be cracking on with those this weekend now I hope. I'll have to wait and see what fun and games now await me.
Thanks for the heads up, I've been remarkably surprised how well the original ones have come up in all honestly, given they're not broken or beyond repairing, I'm happy to just leave them restored and covered in copper grease. In terms of the exhaust, I think I'll let sleeping enemies lie for now. I've got enough to deal with without creating more issues. No doubt I'll tackle them eventually though!
Any input on any of the above points from your experience?
The good news is that the front forks went back on tonight and I've sorted the mess that was the headlight wiring. Looks of horrible destroyed connectors have been cut out and replaced and I now have a fully functioning 7inch headlight and pilot light so I should be good come the darkness now!
29
« on: June 28, 2020, 11:40:26 PM »
Well I feel that I should post something up here, there has been lots of progress made albeit the carbs are still sat on my workbench waiting for the last part to come in before reassembly.  IMG_8270 IMG_8270 by Mark Woodrow, on Flickr The front end of the bike has been stripped, I've already refurbished the front brake caliper. There was a some gunk in there and some corrosion so its been through the ultrasonic and given that there was some pitting to the piston that's being replaced. I just need to drop the new piston and seal in now that its been repainted. The brake MC rebuild kit should be in tomorrow to let me crack on with that too. There was a hideous amount of dirt and grime all around the mechanism so its all been cleaned up now. Guess which ones fuel and which one's brake fluid...  IMG_8260 IMG_8260 by Mark Woodrow, on Flickr  IMG_8248 IMG_8248 by Mark Woodrow, on Flickr  IMG_8244 IMG_8244 by Mark Woodrow, on Flickr As if I needed any more encouragement for my new braided brake lines, these had erm seen better days   IMG_8230 IMG_8230 by Mark Woodrow, on Flickr I also realised that this was never going to be going in back straight ever again so I'm, waiting on replacements from David Silvers  IMG_8211 IMG_8211 by Mark Woodrow, on Flickr The front forks have been fully stripped and after a battle with the oil seals, they're now free! Much hammering with a pry bar later, after them being extremely stubborn... As you can see the lower threads were looking very sad so I've restored them back to glory and have new stainless hardware to be hidden under copper slip. I'm planning to paint up the lower forks and new seals should be in tomorrow to allow me to rebuild those with fresh oil. The oil looked hideous, it was totally black with deposits in the bottom and smelt horrendous for whatever reason. The forks certainly needed some TLC.  IMG_8280 IMG_8280 by Mark Woodrow, on Flickr  IMG_8281 IMG_8281 by Mark Woodrow, on Flickr  IMG_8336 IMG_8336 by Mark Woodrow, on Flickr  IMG_8339 IMG_8339 by Mark Woodrow, on Flickr I also have a new aftermarket 7 inch headlight and headlight bracket to go on, and am working out my options to install LED indicators to clean up the front end. I know the purists won't like me but I'm looking to modernise the bike in several areas. I will have some work to do on the wiring first though as some of the PO's have made a mess and their standard's are concerning to say the least! I'm going to have to spend some time with the wire wheels on the front fender to see what comes up however its really seen better days. It's making me feel better about my intentions to potentially take a grinder to it to chop it down and simplify the front end.  IMG_8272 IMG_8272 by Mark Woodrow, on Flickr My new Avon Road Rider Mk2 tyres have also turned up, there was no way the 18 year old tyres were being left so new inner tubes and rim tape are sitting at the ready. I just need to work out whether these are something I can install myself with some tyre irons? I've gone for a 3.25 - 19 for the front and 4 - 18 for the rear which seemed fairly close to stock given the available compound choices.  IMG_8301 IMG_8301 by Mark Woodrow, on Flickr Equally is there any advice around wheel bearings on these bikes? should I be able to recycle whats there or is it best to just replace? A guy from the farm I'm working on also kindly lent me a compression tester so I've now done that this weekend with the following results (cold test as the carbs are removed) Cylinder 1 - 120psi Cylinder 2 - 115psi Cylinder 3 - 127psi Cylinder 4 - 125psi Noting the low figure on Cylinder two this evening I did a further wet test having dropped in a few drops of oil to see what happened and it jumped up to about 128psi so it looks like I have some wear to the rings on Cylinder two if I'm correct? Anything to be worried about at this stage? I fully intend to conduct an Italian tune up once I've got the bike back on the road just to try and clear everything up and see how its really running but sadly that's still quite a way off yet... More to follow soon I hope!
30
« on: June 20, 2020, 12:59:58 PM »
I've just taken the long read of this epic journey, what an adventure you're on! I do admire your enthusiasm and sense of humour through the difficult times and battles with stubborn parts. It looks like you're making some amazing progress. It's giving me some great and no so great ideas of what to expect along the way! Keep it up, I'm glad to see that fire is still las relevant today as it was a couple of thousand years ago!
|

