Show Posts

This section allows you to view all posts made by this member. Note that you can only see posts made in areas you currently have access to.


Messages - McCabe-Thiele (Ted)

Pages: [1] 2 3 ... 426
1
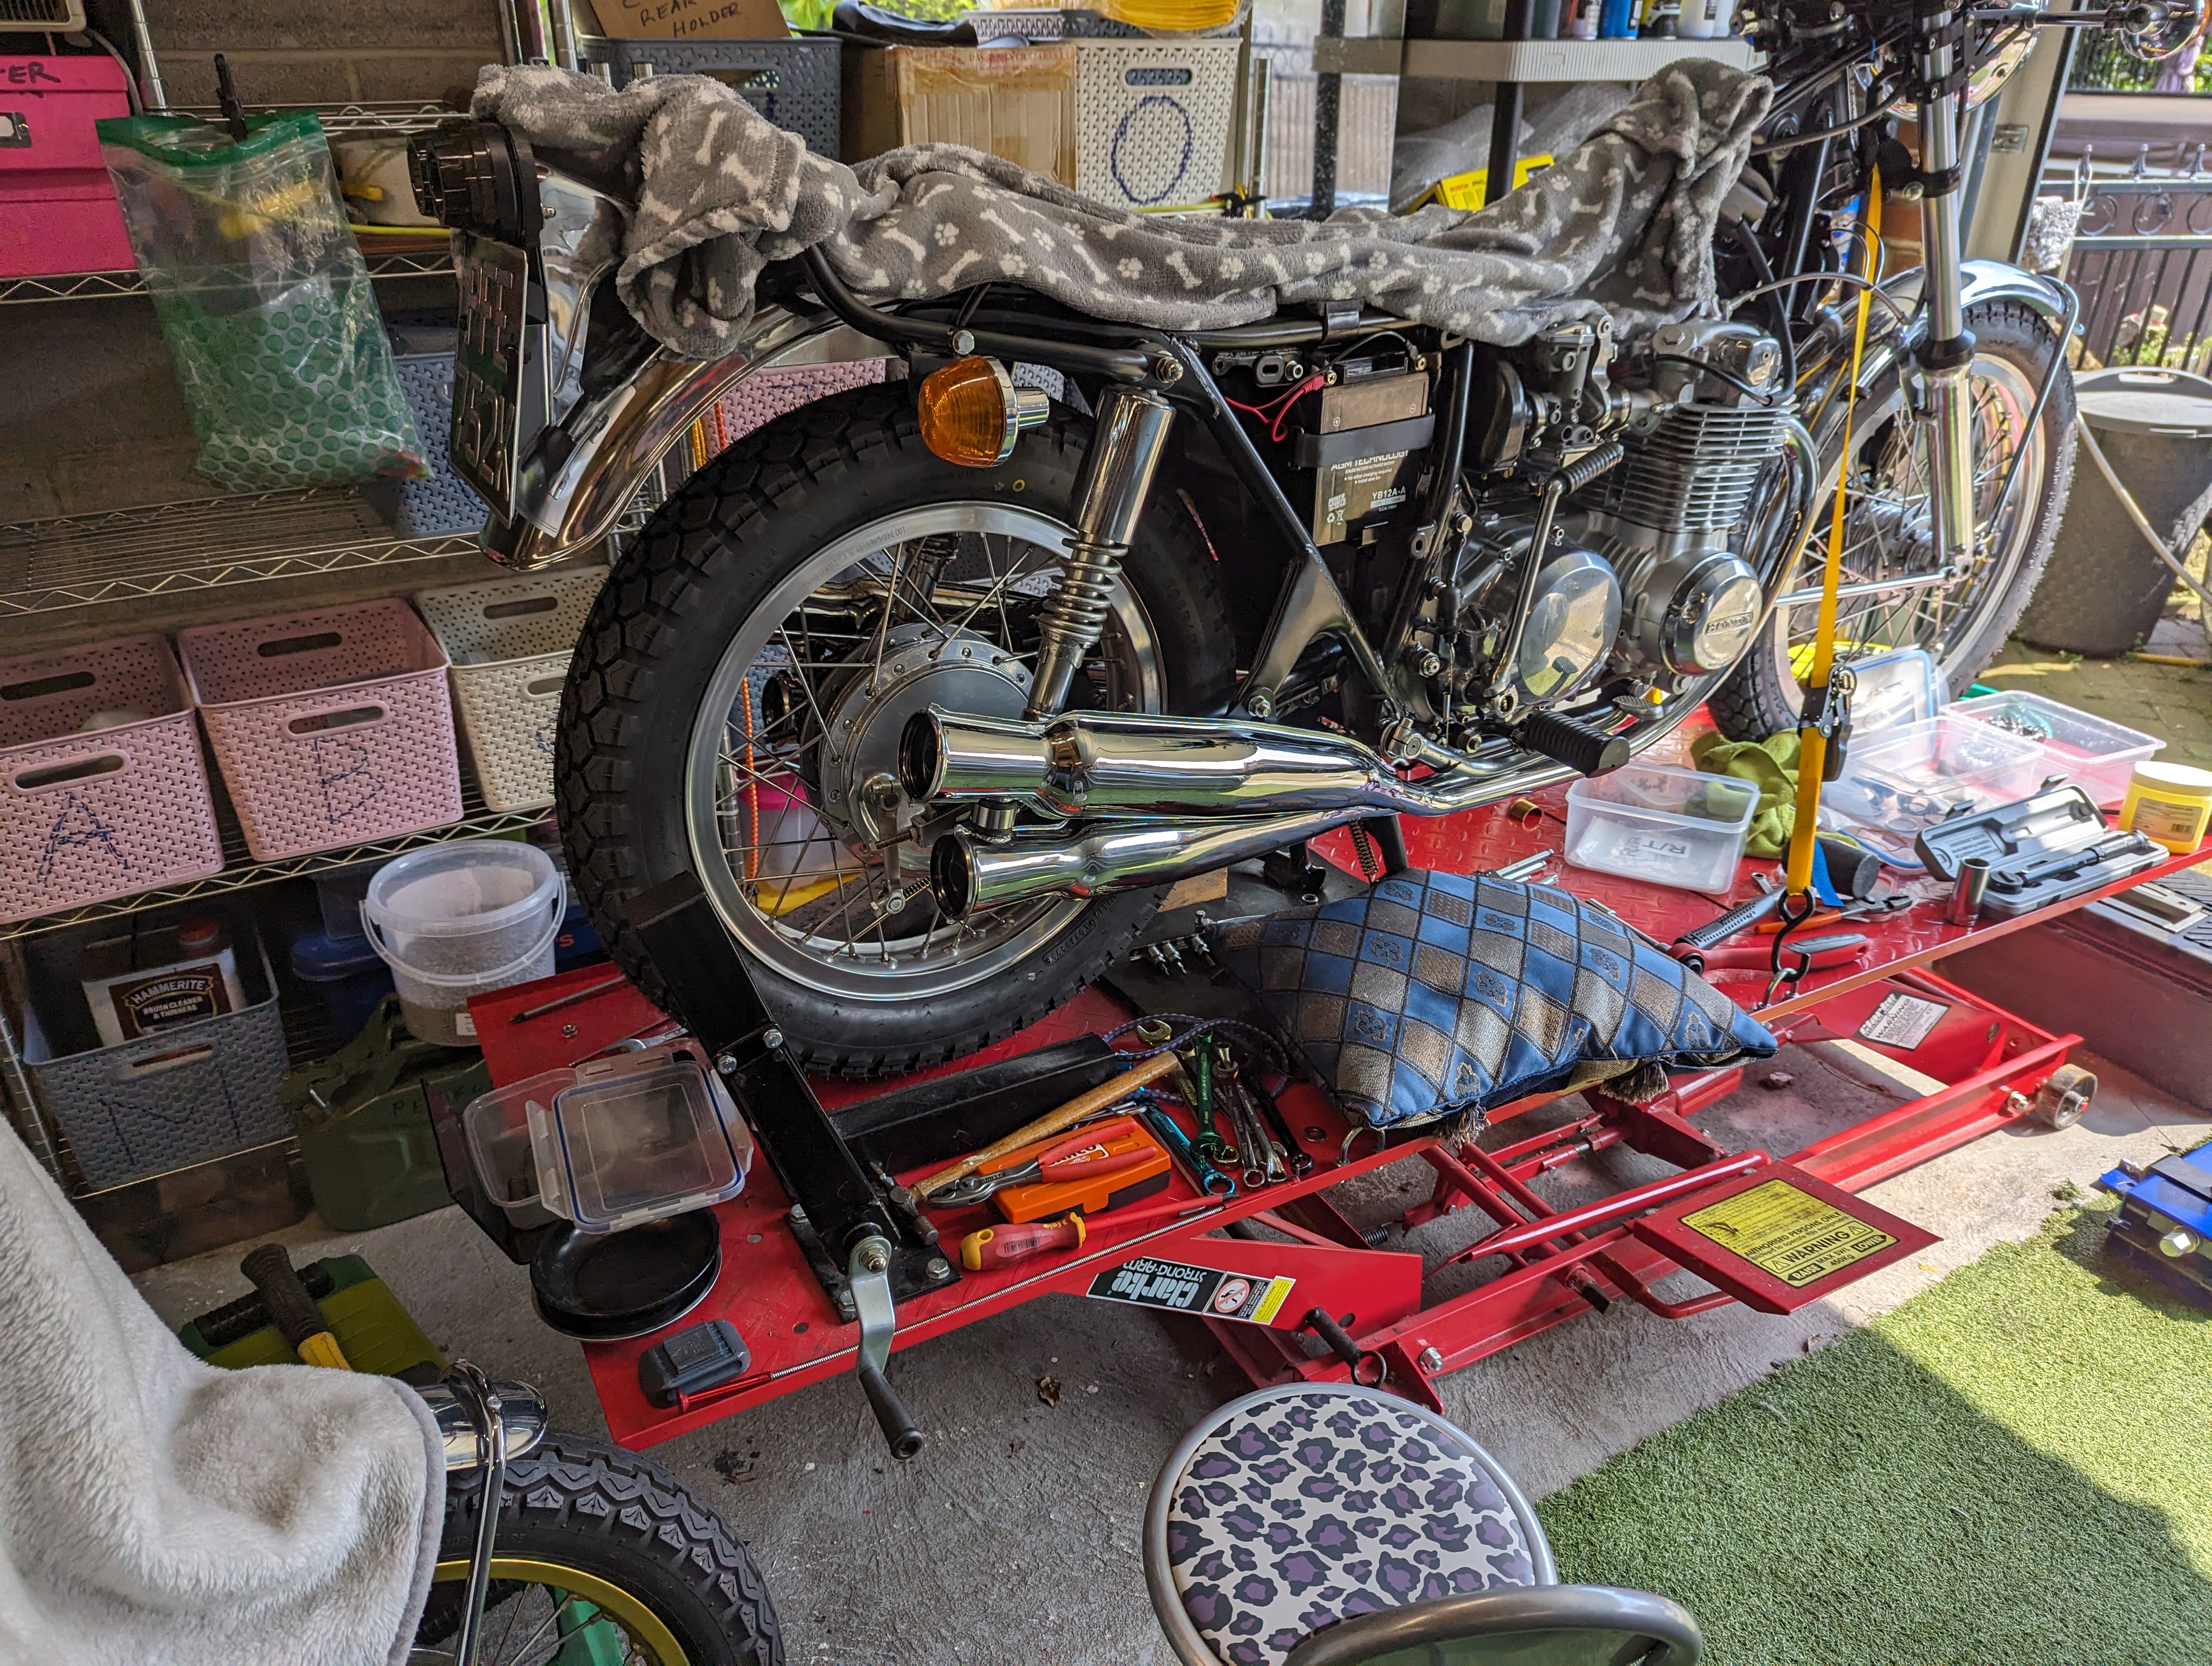
I have a theory Julie that the issue on the left side upper exhaust might have been related to the rear foot peg bracket end angled section just looking very slightly different on the bolt hole end section from the right side. I suspected wrongly that the right side was slightly mis-shapen due to the previous 4:1 system fitting.

The one on the right side that fitted perfectly had a distinctive angle at the tip, the left side hanger was not a mirror image - it was visually slightly different a smoother curve.

One advantage for me was by fitting the bracket to the upper exhaust with the balancer pipe connected I could see where the bolt need to align with the bracket. This meant I only needed to file it once as I could see where the slotted hole needed fettling. I did not need to elongate the angled slot just take a small amount of metal from the middle top of the slot.

2
Misc / Open / Re: Thanks are overdue from Lazarus
« on: Today at 12:54:14 PM »
Nicely phrased Mick - when I look back at your starting point it's brilliant work you have done on what was definitely a dead bike, the CB 500 lovely bike , that bike was no more, it had ceased to be, destined for that bike yard in the sky.

Arise Lazarus now alive again ;D ;D ;D

3
SOHC Singles & Twins / Re: My first project - 1974 CB360 K0
« on: May 12, 2024, 08:45:16 PM »
Presumably you have actually counted the teeth on the front sprocket as well or is it stamped on it?
One tooth more makes a big differance.
Does your new chain sit fully on the sprockets as it should?

Otherwise I'm stumped ???


4
SOHC Singles & Twins / Re: My first project - 1974 CB360 K0
« on: May 12, 2024, 07:30:31 PM »
It's either the wrong chain if it's like that or the front or rear sprocket don't have the right number if teeth.

5
SOHC Singles & Twins / Re: My first project - 1974 CB360 K0
« on: May 12, 2024, 07:11:09 PM »
I use a cable tie to pull the ends together then pop in the link.

6
I removed the left side top silencer, loosened the clamps on number two front pipe to find a nice stress free position. Lightly nipped up the clamp on number two port.
I removed the bracket from the upper silencer then re-fitted it as previously. When re-attaching the bracket I could see that the top slot needed a little opening up at the top of the slot to allow the upper exhaust to drop down a tad. A small amount seems to make a difference at the tail pipe end. It all went together well except when clamping the hanger bracket it wanted to pull out of the balancer joint. The Delkevic top bracket has a half circle reinforcing plate attached to the bracket. If I fully tighten the hangar bolt it starts to tip the rear of the silencer.

I'm chewing over the options - might try and fit a sawn in half washer to keep it all flat at the same angle .

Update Just used a slightly thicker stainless washer that has a slight dished shape, fully tightened the nut on the bracket all stayed in place.

7
Dave I have a small auxiliary petrol tank so if all goes to plan I might go for a first start up next week. Not checked the timing yet but it's a real possibility.👍👍👍

8
Just noticed my Chihuahuas photo bombed my exhaust pic. 😁

9
CB500/550 / Re: Frame/Swingarm prep for paint
« on: May 12, 2024, 12:05:57 PM »
That made me chuckle - that why I use an old cheap spare  set for such things. lol

12
So this morning before Brunch I fitted the right side system (I still plan to remove the left upper for fettlig) including looking for the parts and the right spanner done in 40 minutes - it went like a dream.

Slight improvement on previous method of fitting the Delkevic system. Firstly I fitted the lower pipe threading on the clamp beforehand. I held the pipe into number three exhaust port whilst holding the silencer end pretty much in line with the inside of the hanging bracket in place - I temporarily used a thinner bolt to pop it through the bracket to hold the silencer roughly in position. I then fitted the collets into position and nipped up the clamp ensuring it felt free, cleared the frame, the engine it looked nice and square into the port. I then removed the temporary bolt fitting one the right size and nipping it up so the bracket was fully against the hanger.

I fitted the joint & clip  onto the lower silencer, the top silencer with clamp over the pipe without the rear bracket in place I fitted into the area of number four port so I could slot the top silencer into the joint pipe. Bungee strap wrapped around the end of the silencer to stop the rear joint from poping out of place. Front collets in place then nipped up checking it was clear of the frame and engine. There is plenty of room to then fit the rear silencer bracket in place, tighten the two nuts. Then push back the main bolt to slip on the second bracket.

Lower silencer bracket is on the inside of the hangar, upper silencer is on the outside - nip up exhuast clamps and finally put a nut on the hanger bolt. At the moment I have no rear footrests fitted as I'm not as yet happy with the way they "hang".

Clearly I learnt a lot from doing the left side - I will be removing the left top silencer over the next few days to fettle so it's as good as the right side.

13
I agree with your approach using our real advantage as time rich private restorers. So what if takes hours  - getting an unstressed connection at the ports  that you don’t have to worry about will be worth it. Too much to hope that these aftermarket units would just bolt on but your patience is going to be rewarded.

Oh David I like the term time rich I just wish I had the phrase energy rich to match it.
I fitted the side stand in place before fitting the left side system - when using my spring puller I was giving it more grunt that some well known Tennis players.
It was my third full on fully grunted effort that got the piddling looking spring into the slot!  :'( :'( :'(

14
Good work Ted, I will be doing the same job soon. I also like the look of those alloy rims as they remi d me of my original 500 in 1975.

Thanks Mick I was going to go for Gold anodising as on my 400 as it would look good against black panels,
I went for the alloy anodising instead with slightly wider rims as were fitted to the bike by PO.
Pleased to hear a positive comment as I still have hidden regrets about not choosing gold.

One thing for sure I'm pleased the Nut Brown Frame never happened. ;D ;D ;D

15
Fashion is a strange thing if can make a none-PC comparison when I was a teenager the Mini Skirt was all the rage - for me it has never gone out of fashion. The Lotus Elan S4 was always  attractive - it still is today.

In the early 1970's I thought the four pipe bulbous system on Hondas was dated compared to a decent four into one system.
Now 50 years later I chose the four pipe system not for orginality or as they are cheap - I finally understood that Honda were aiming for a classic style that endures.

Pages: [1] 2 3 ... 426
SimplePortal 2.3.5 © 2008-2012, SimplePortal