This section allows you to view all posts made by this member. Note that you can only see posts made in areas you currently have access to.
Messages - Underdog1
Pages: 1 ... 24 25 [26] 27
376
« on: August 01, 2016, 02:34:07 PM »
Oooookay, So a few bits arrived in the post today, my replacement ignition and remote tank which got me a little excited as finally i can see if this thing starts right? So first thing i notice is in key position 1 i seem to have power, the neutral light comes on, if i press the horn i get a very weak sounding fart noise,no headlight and unfortunately I've already stripped off the brakes and rear light so can't check those right now. Key position 2 the neutral light goes out and the horn ceases to work so somethings going on there. The connectors that go into the ignition connector block short with each other mega easily but i made sure they weren't touching each other and still no luck. Electric start also didn't do anything. Anyway i thought its worth trying to kick it anyway to see what happens, plumbed in my remote tank (credit to Jamesh_sussex for the link) and fuel just immediately pissed out of carb 1&2 from the areas circled. Haven't got my haynes manual to hand so apologies for the lack of technical terms (and knowledge hah).  is this likely to be stuck floats? Was hoping i could see if it would run first before rebuilding the carbs but looks like this is going to be my next job. Just want to hear the old gal growl 
377
« on: July 30, 2016, 09:37:20 PM »
500 fours and 250/350 use smaller versions.
Do they all have the same 'ratio'? I believe some tachos differ between models; I had a couple with different ratios printed on the back of the casings.
Note also that 250/350/360 twins and 350/400 fours have 18" front wheels while 500 and above have 19", may also affect your choice.
Ok cool that's given me something to consider, although I doubt an inch difference in diameter is going to affect things massively as its only roughly 5% difference in running circumference. I'm sure these speedos are pretty inaccurate anyway #maths
378
« on: July 30, 2016, 03:32:57 PM »
So being the tight arse that i am i made my own bearing retainer removal tool today  Worked pretty well.  Didn't get long to work with the bike, didn't manage to get either wheel bearing out, should they just slide out each side at this point or do i need to be pushing them through and out the other side? My haynes manual just states that at this point the bearing can be removed. Might be a case or trying to yank them out with a screwdriver i suppose. The threads on the bearing retainer look mega delicate being very fine aluminium, is this something that is usually replaced when changing wheel bearings? Current state: 
379
« on: July 30, 2016, 03:27:04 PM »
500 fours and 250/350 use smaller versions.
Perfect.
380
« on: July 30, 2016, 12:50:48 PM »
Yup, but I think you have to use the earlier (K1,2,3) one as the later one is NLA
just checked mine over and it looks hardly worn at all so probably going to stick with it. Looking forward to the future i intend on doing away with the tacho and just having a speedo, I've seen the speedo centre mounted before and it just looks a little..big.  I love the styling of these old speedos though and don't want to buy anything new. Does anyone know of any bikes similar looking speedos that are a bit smaller?
381
« on: July 29, 2016, 10:38:10 PM »
I've had the pan powder coated black so that the underside doesn't need to be upholstered and you have access to the bolts. I will be bolting all the electrical items to the underside of the pan anyway
Mike
ok cool, i just can't get it in my head how the upholsterers leave the bottom of the seat pan bare
382
« on: July 29, 2016, 10:01:20 PM »
Here's a few pictures, if there's anything more specific you want taking, just let me know.
Mike
Ill be making something similar in the near future and this is how i envisage doing my seat base. The one thing i haven't figured out yet is do you weld the nuts on to the top of the aluminium, glue foam on top, shape, then have the entire thing upholstered (including the underneath side) and then cut holes for access to the nuts? Or does the upholster leave holes in the material for the fixings?
383
« on: July 29, 2016, 08:40:59 PM »
The collar is the steel bit that the bushes pivot on mate NOTE:- NOT the bolt that goes through the inside of the collar ( I call it a pivot but Honda call it a collar)
Do you mean number 9 in this diagram? 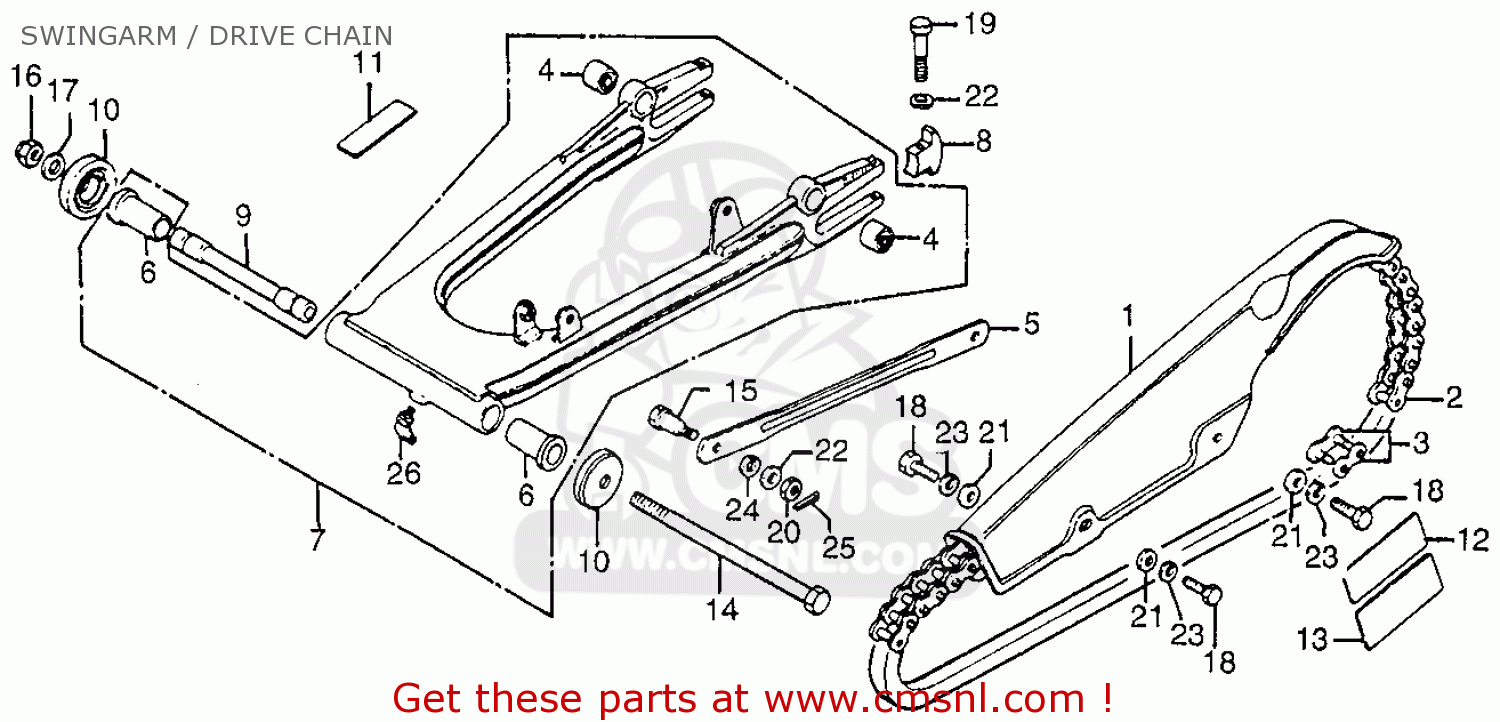 Is there anything i should check for specifically to see if its worn beyond the point of reuse?
384
« on: July 29, 2016, 03:58:58 PM »
The collar is frequently more worn than the bushes and costs even more
The collar? mine look like top hats and are one piece  Managed to get a quick bit of time on the bike in today, just stripped down the front and rear brakes, attempted to remove the rear wheel bearing (didn't realise i needed a special tool) and just cleaned a few bits
385
« on: July 29, 2016, 11:08:59 AM »
Its seems over the other side of the pond trick parts for SOHC bikes are plentiful and cheap with suppliers like Dime City Cycles and 4into1 (to name only two out of many!).
Over here it seems aftermarket bits are insanely priced and just a bit crap. Does anyone know of any decent suppliers i can look up? Im after some brat style / cafe racer bits
387
« on: July 28, 2016, 09:09:24 PM »
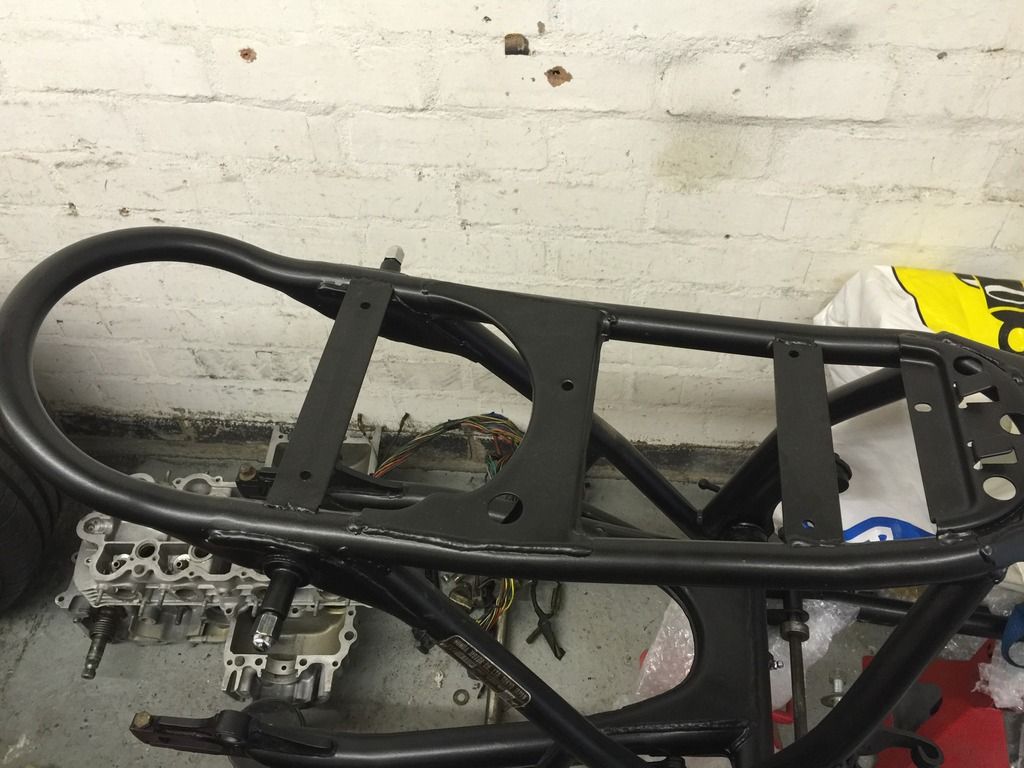
That's the grease nipple for the swingarm pivot assy. Bracket is unique to K6 and acts as a hose guide - can't remember which hose..
ah ideal, thinking about it its probably for the battery breather which i yanked out yesterday 
388
« on: July 28, 2016, 08:48:47 PM »
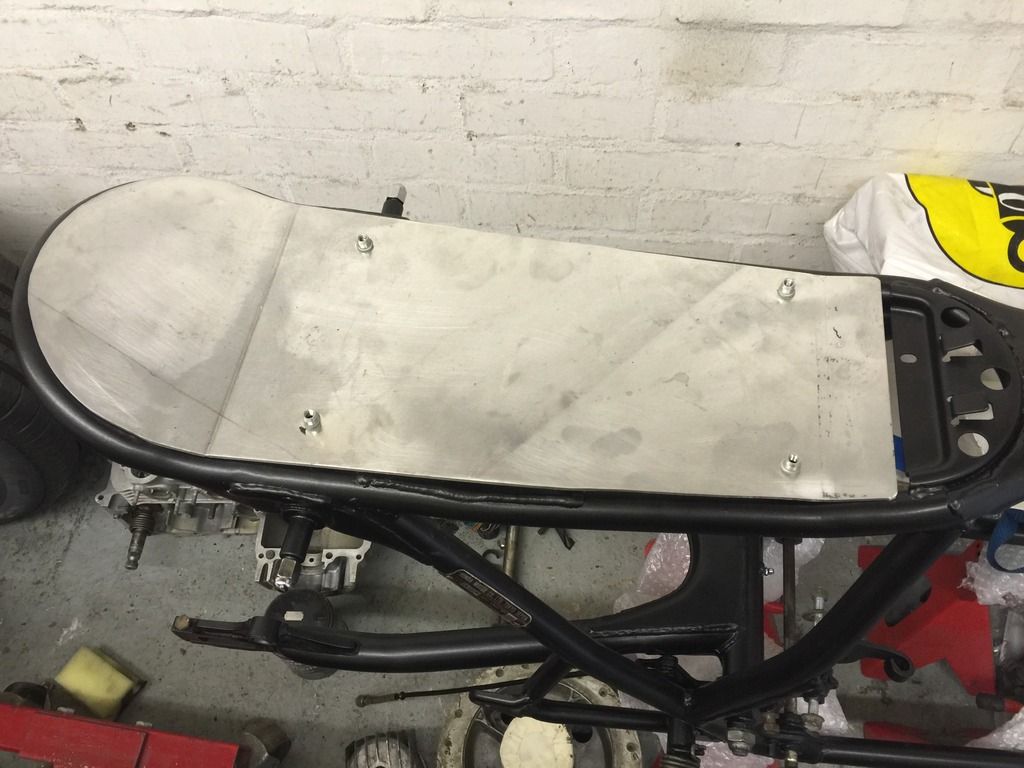
Just stripped the back end down today and cleaned a few bits up, nothing really noteworthy. Anyone know what this little nipple bit on the swingarm is for?  Also theres some little bracket down near the centre stand which doesn't seem to be doing anything, is this for a stand sensor or something? 
389
« on: July 28, 2016, 02:43:40 PM »
I used it neat on a tank with a Kreeme liner. Left it in for a couple of hours, swilled every 30 mins and then drained through a coffee filter for re-use. You may want to de-grease the tank first so the MEK can get straight on to dissolving the liner without a grease barrier to deal with.
Thanks for the info, although that does mean I'm going to need 18 litres of the bloody stuff!
390
« on: July 28, 2016, 01:48:08 PM »
Order some MEK (Methyl Ether Ketone) which is an industrial solvent. It will eat the sealer (and any paint so be careful if you want to preserve the paint).
Cool,have heard that mentioned alongside acetone as good for cleaning out tanks. Is there an established method for using MEK? I.e. do you ust swill a few litres about or dilute it and brim the tank to leave overnight etc?
Pages: 1 ... 24 25 [26] 27
|


