Show Posts

This section allows you to view all posts made by this member. Note that you can only see posts made in areas you currently have access to.


Messages - PMK

Pages: 1 [2] 3 4 ... 7
16
CB750 / Re: best brake pads for my k1
« on: September 06, 2010, 01:59:02 PM »
If you can get them I would use EBC HH range. That is if they are available for that model.

But generally any pad oreinted toward the sport end of the market will help.

Also you'd be surprised at how much difference a fluid change makes too.

17
Misc / Open / Re: A film
« on: September 04, 2010, 09:50:58 AM »
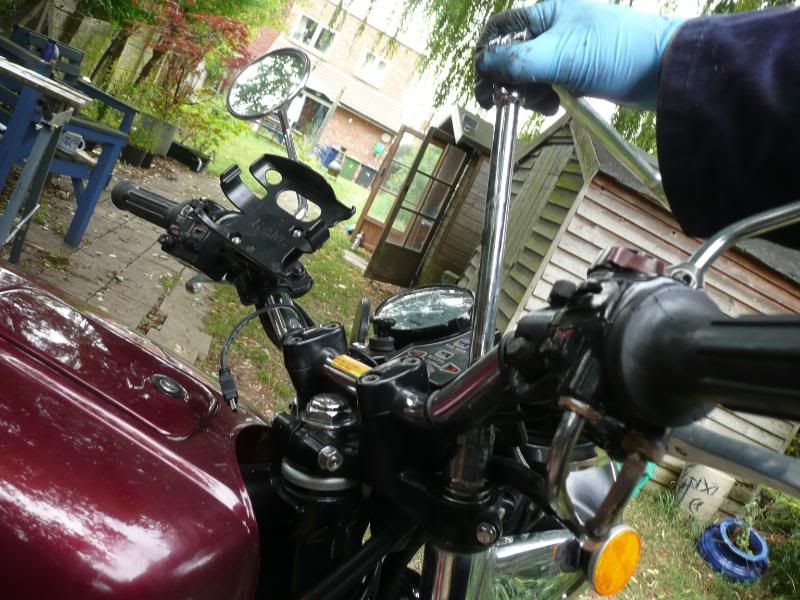
Originally I mounted it on the bars of the Harley. But and that's a I know what's good for my eyes kinda but, it was affected by the vibes. It was real Trippy as all the straight lines turned into S shapes.  :-X

So I tried it on my jacket with the clip and as you saw in the second video it worked real well behind the screen.

I clipped to my jacket for the Honda film but it was affected badly by the wind moving my jacket (no screen see).

I'm going to try a few more different places and post the results looking for the best place but mounted to the body seems to give the best results as due to my racing snake figure (not)  ;D the vibes get cancelled out
18
Misc / Open / Re: Gold Wing
« on: September 03, 2010, 09:39:44 PM »
That looks remarkably like Paul "Angry Ant" Lewis at the helm.

On the same but diffrent note Valkyries (an unfaired Goldwing custom) wheelie really well  ;)

Don't ask me how I know this  ;D

19
Misc / Open / Re: A film
« on: September 03, 2010, 09:32:15 PM »
I used my new toy. It's a

20
Misc / Open / A film
« on: September 03, 2010, 01:08:24 PM »
I shot from the CB750

It's 10 minutes long so boredom is allowed.

I did have some tunes but youtube disabled them

CB750a2.flv


21
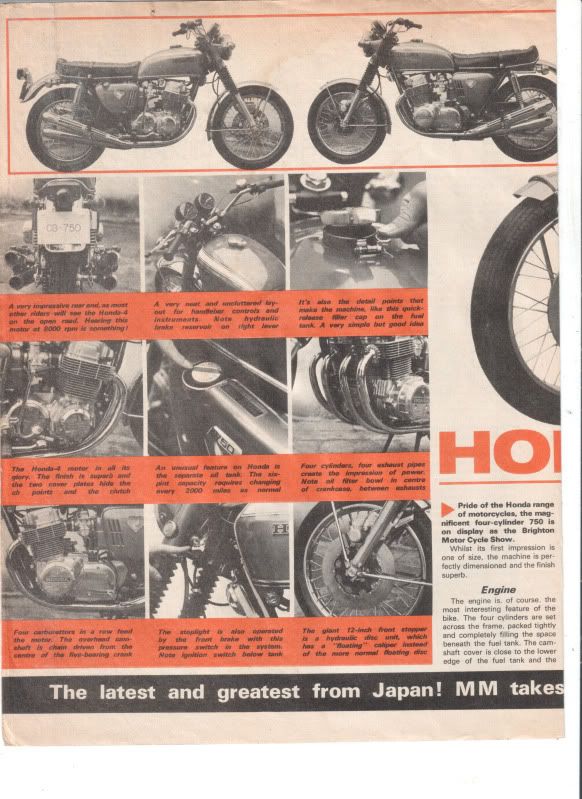
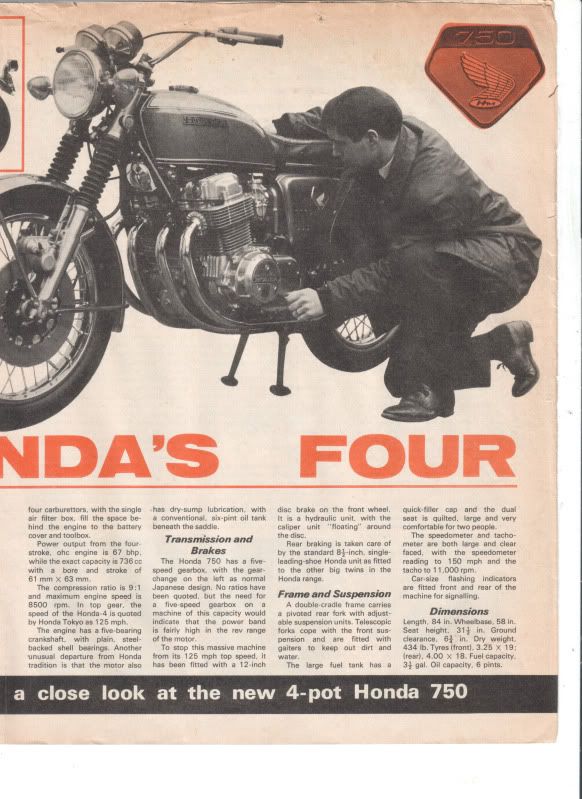
CB750 / Found this in old mag
« on: August 30, 2010, 10:36:03 AM »
It's a first look by Motorcycle Scooter & Three Wheeler Mechanics from May 1969 at the CB750 launched at the Brighton Show

Enjoy  ;D


Hope this works ok

If anyone wants the original 2 pictures just pm me

22
Misc / Open / Re: Prototypes ?????????
« on: August 20, 2010, 10:42:57 PM »
Katana lookalikie for me !!

23
Misc / Open / Re: Nostalgia
« on: August 18, 2010, 08:24:05 AM »
That wasn't my first bike.

I had at the same time as my CB900. I used to use it for diving round the shops or going to work in the summer

24
Misc / Open / Re: Nostalgia
« on: August 17, 2010, 09:06:00 PM »
Time to go 1 up


Guess who got dared  ;D

It's a Mobylette fold up job. I swapped it for a crash helmet and I don't remember what I did with it.

Yes I know how they are worth now  :)

25
Misc / Open / Nostalgia
« on: August 12, 2010, 07:15:39 PM »
I found some of my old pictures and thought you might enjoy my CB900F

First as I bought it with a hideously restrictive exhaust


The pipe was mega loud and it wouldn't rev past 7,000

Then I gradually sorted it and it was a great mile muncher


Note the micron exhuast and the GPz fairing it also had a LEDAR kit too, (remember them) it consisted of new main jets, a circlip spacer for under the diagphram and a plug for the idle jet.

Happy daze

26
Tricks & Tips / Re: Fork Seals 750F2 (Long with pictures) Part 1
« on: August 08, 2010, 07:33:57 PM »
If the seal has been leaking real bad it's always a good idea to replace the brake pads too.

Mine were salvaged with brake cleaner and a rub over with sandpaper.

Hope this helps someone

 ;D

27
Tricks & Tips / Re: Fork Seals 750F2 (Long with pictures) Part 1
« on: August 08, 2010, 07:32:18 PM »
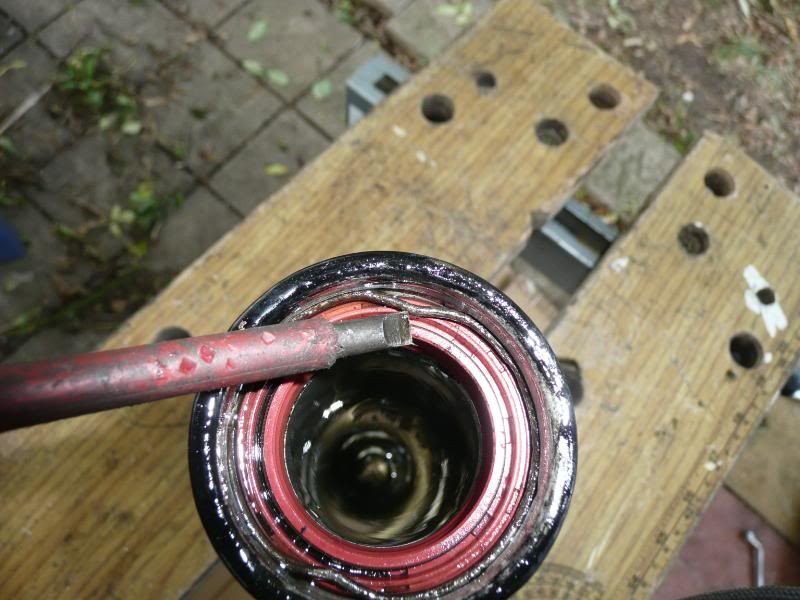
Use the old seal to drive the new one in. Once the groove is seen replace the C clip by poking it into the groove and gently pressing it into place. Ensure it goes in all the way round with a nice click noise.

Next re-insert the leg and slide the dust cover into position, Then refit the allen screw in the base.

In the best traditions of the Haynes manual re-assembly is the reverse of dismantling. Then do the other one.

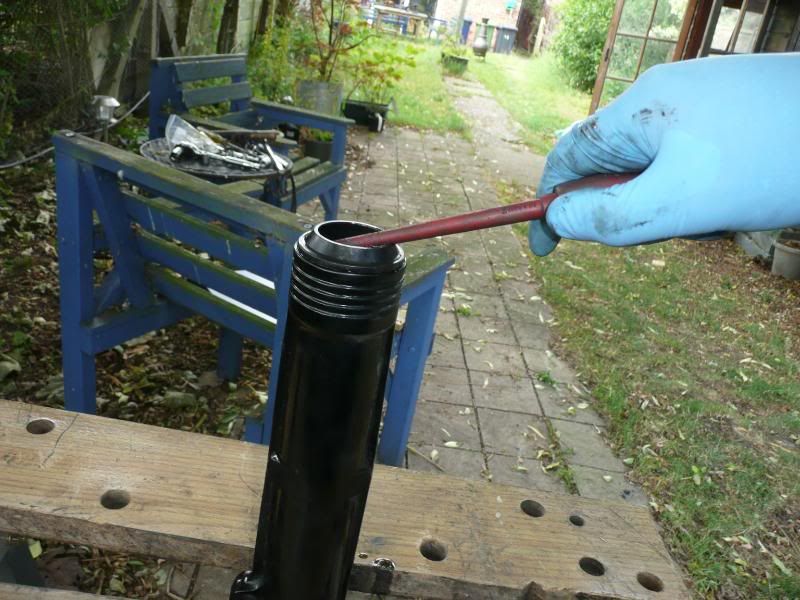
Once both seals are replaced refill with oil. To do this you need to remove the big nut at the top of the leg (23mm Socket) like this


Then fill with oil, I use a big 60ml syringe and as the F2 uses 155ml I do 2 fills of 50ml then a 55ml one.


28
Tricks & Tips / Re: Fork Seals 750F2 (Long with pictures) Part 1
« on: August 08, 2010, 07:25:45 PM »
Next remove the C clip as shown here


All you need to do is put a screwdriver in the gap and gently lift it out

Next remove the seal the same way you did the dustcover. Then wipe the bit where the seal sits and insert the new seal.

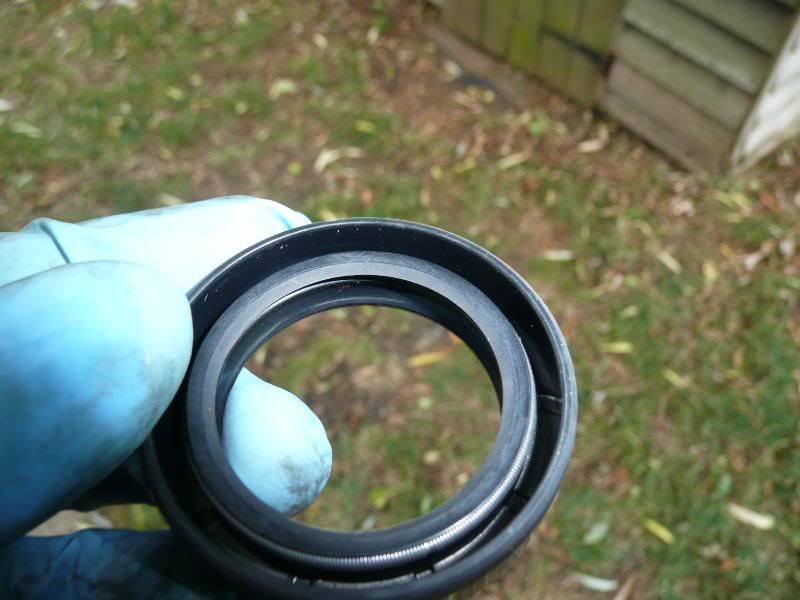
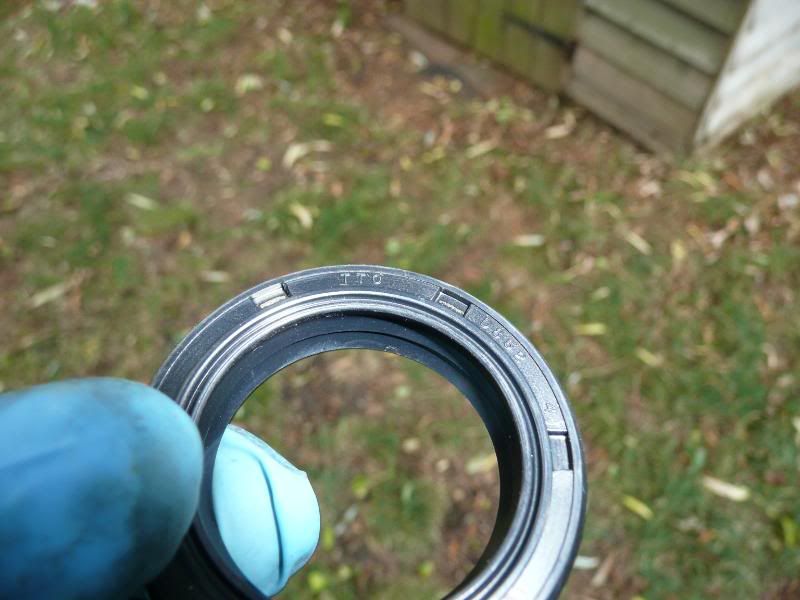
Wrong way up


Right way up


29
Tricks & Tips / Re: Fork Seals 750F2 (Long with pictures) Part 1
« on: August 08, 2010, 07:22:45 PM »
Then drain the fork leg into a suitable receptacle


On mine I had drain screws so I used them

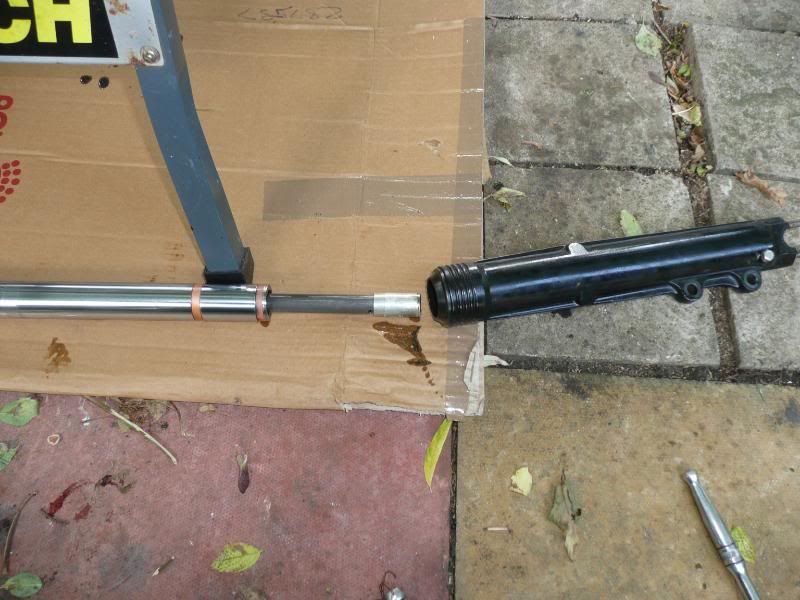
Now pull the leg apart and you should have this


Transfer the bottom of the leg to your vice/workmate and remove the dust cover by putting a screwdriver under it and gently lifting
 

30
Tricks & Tips / Re: Fork Seals 750F2 (Long with pictures) Part 1
« on: August 08, 2010, 07:19:02 PM »
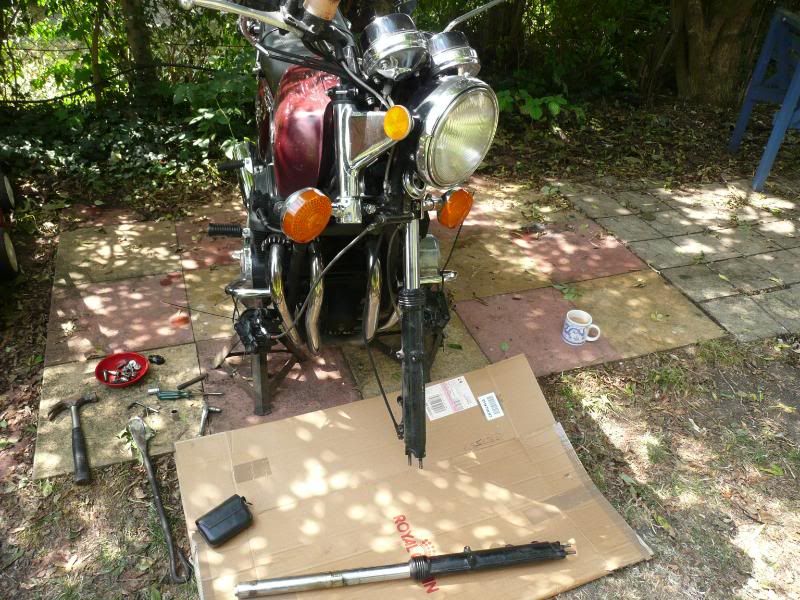
So this is what you should have about now


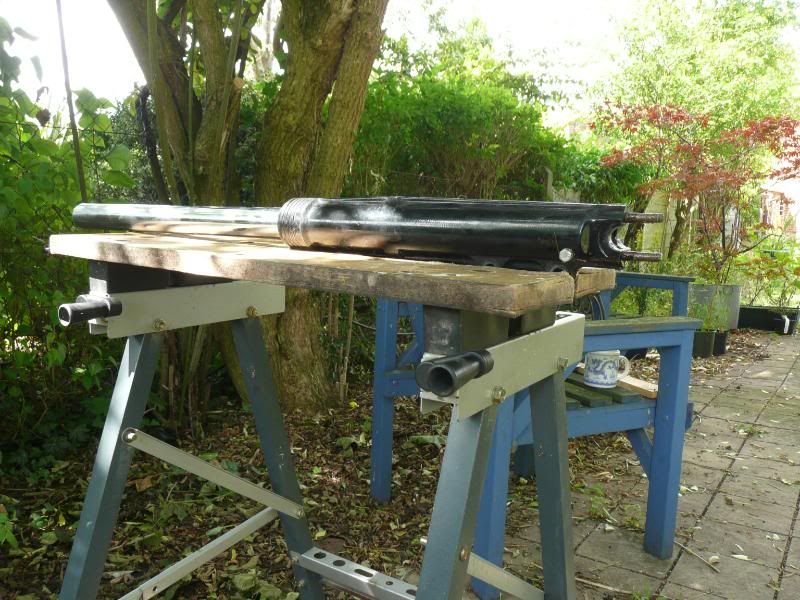
So we now transfer the leg to a vice or a workmate or something


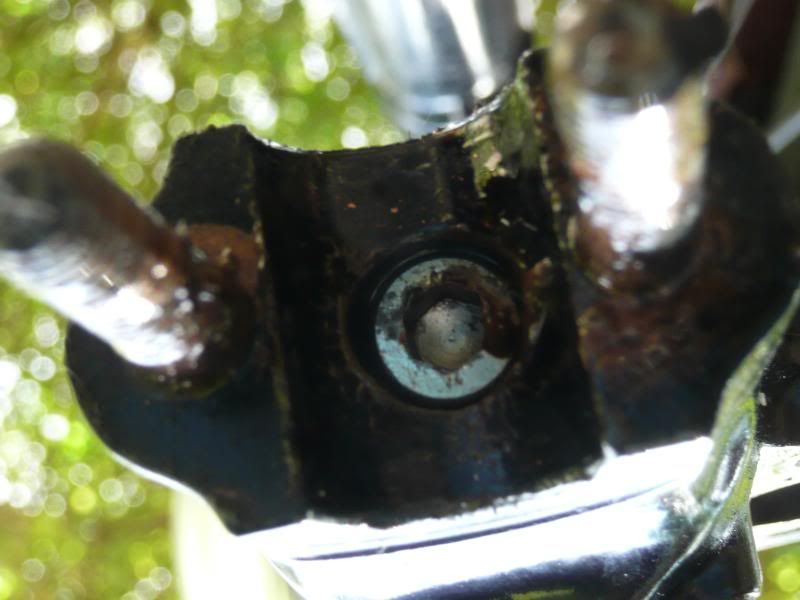
Then looking up the end where the spindle lived you see this


Its a 6mm allen bolt that needs to be undone and removed

Pages: 1 [2] 3 4 ... 7
SimplePortal 2.3.5 © 2008-2012, SimplePortal